| Author |
Message |
    
chris_spring
Senior Member
Username: chris_spring
Post Number: 235
Registered: 02-2019
| | Posted on Tuesday, December 27, 2022 - 12:30 pm: | 


|
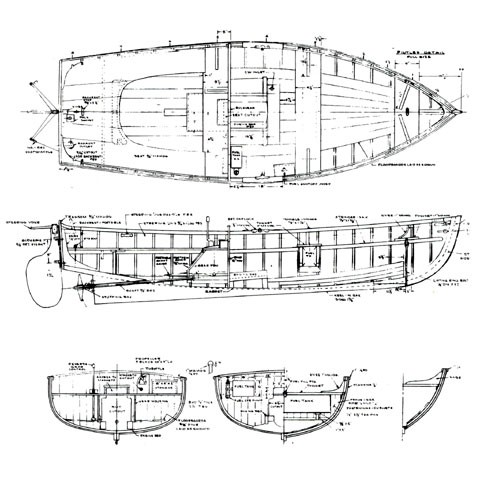
Elsewhere you will see I am inquiring about engine work on my Kingfisher A2. The reason for that is that I currently have on order two sets of plans from the Mystic Seaport Museum. One set is for a yacht tender dating 1905. the plans should be here any day now.
Once I get those I will determine the feasibility of building the boat and incorporating the Kingfisher engine into it.
Tentative launch date would be spring of '24.
Cheers!
 |
    
chris_spring
Senior Member
Username: chris_spring
Post Number: 240
Registered: 02-2019
| | Posted on Tuesday, January 03, 2023 - 04:25 pm: | 


|
For your viewing pleasure.
There is a lot here to mull over. My plan is to power it with the Kingfisher which I am currently overhauling.
I have almost everything I need.
The plan shows a transmission. That I don't have. I'm not sure where I could find something suitable or how feasible building one would be.
The plan also shows a transversely mounted fuel tank under the front seat. It also has a wobble pump and a header tank. I have the header tank.
The drawing shows a 3/4" propellor shaft, a stuffing box, and a 10x8 prop. Of those I have 2 out of three.
This could be really, really cool.
Cheers!
https://www.youtube.com/watch?v=V-ldWGOvgXI |
    
chris_spring
Senior Member
Username: chris_spring
Post Number: 242
Registered: 02-2019
| | Posted on Thursday, January 19, 2023 - 04:34 pm: | 


|
Work continues on the feasibility stage of building the Lawley Tender.
Today I set up a 14' long lofting table. Early next week I expect to start lofting. The decision whether to build or not will come after I've had a good chance to look at it, and finish costing it out. I hope to take the decision by late February.
If it is a go I will work on as many small parts, molds etc before the end of winter. They can then be set aside with a view to doing most of the work next winter.
In addition to the header tank, I now have a transfer pump which dimensionally is very close to the original. If I go ahead with this I will have to have a main tank made to complete the system.
Cheers! |
    
miro
Senior Member
Username: miro
Post Number: 1214
Registered: 11-2001

| | Posted on Friday, January 20, 2023 - 09:00 am: | 


|
Chris, have you considered a future installation of an electro-drive?
A growing number of DisPro boats are being converted, from the copper jacket engine to electro-drives, for several reasons - it's quieter by a lot ( even though it's called a Silent DisPro), is less smelly, less crap in the bilge over time, and has a FWD -N -Rev to greatly assist in manoeuvring in and out of docks and trailers.
The conversions are using 3.5 kW motors - which is way over-kill given the copper jacket engines are rated a 2 to 2.5HP or the equivalent of a 1.0kW electric motor.
So, while you are in the design stage, maybe consider what an electro-drive conversion might need.
miro |
    
miro
Senior Member
Username: miro
Post Number: 1215
Registered: 11-2001

| | Posted on Friday, January 20, 2023 - 09:07 am: | 


|
Have you considered a conversion, later, to an electro-drive?
More DisPros are being converted from the copper jacket or St Lawrence motors to e-drives.
The e-drives are 3.5kW which is way over-kill, since the copper jacket engines are rated at 2 , 2.5 HP or the equivalent of 1.0-1.2kW .
Boaters are finding that it's much quieter and much easier to manoeuver when docking or on-off trailer.
I'm considering the conversion of my DisPro to e-drive.
Miro |
    
miro
Senior Member
Username: miro
Post Number: 1216
Registered: 11-2001

| | Posted on Friday, January 20, 2023 - 09:10 am: | 


|
dunno wha=happened .. . first text got deleted, then re-appeared after I wrote the second - oh well Windows and Explorer . . .miro |
    
chris_spring
Senior Member
Username: chris_spring
Post Number: 243
Registered: 02-2019
| | Posted on Friday, January 20, 2023 - 02:42 pm: | 


|
Hi Miro.
In fact I had considered electric. This hull would lend itself nicely to that. However, for now I'm looking for something that will showcase that copper jacketed engine.
Cheers! |
    
chris_spring
Senior Member
Username: chris_spring
Post Number: 247
Registered: 02-2019
| | Posted on Wednesday, February 22, 2023 - 08:24 am: | 


|
Work continues. I have yet to take the "go" decision, but it is getting closer.
Lofting is complete. I have made patterns for all of the station molds, the stem, and the keel.
The plans leave much open to interpretation since the lines were taken off the existing boat,and the drafters were not permitted to do any dis-assembly. As a result I found several errors in the plans and have a lot of questions pertaining to the design and joinery of the keel.
At issue as well is how I will bore a 1" prop shaft tunnel through about 24" of wood and getting it perfectly centred,and perfectly aligned at the correct angle.
I think the smartest thing to do is to mock a stem and keel up out of construction grade spruce. Once I have that sorted I can repeat it in oak. It will be more work, but it could be worth it.
The engine work has yet to be completed. I'm hung up for a new set of rings and a carb float, but that's another story. I'll rejoin the chase on that sometime in March.
If at all possible I'd really like to go ahead with this project. It simply has so much going for it that I am really being drawn in.
I love the lines. And I find other things such as the fuel system interesting.
The main fuel tank is located at floor level.It should hold about 8 hrs fuel. From the main tank, fuel is then manually pumped to a header tank located higher up on a bulkhead. From there it is gravity fed to the carburetor. The header tank should provide about 1 1/2 hrs fuel before more needs to be transferred. Transferring fuel is easily accomplished.
So we'll see where this goes. In the meantime it has certainly been an interesting exercise.
Cheers! |
    
narrabay2
Senior Member
Username: narrabay2
Post Number: 260
Registered: 10-2019
| | Posted on Saturday, February 25, 2023 - 03:39 pm: | 


|
WOW very ambitious undertaking Chris. In my hometown there's a lifetime wood boat builder who publish boat building videos. It's fascinating to watch his work. He explains the techniques and tricks really well. It could either be just enjoyable or maybe even useful.
https://youtu.be/RORoex0TTfY |
    
chris_spring
Senior Member
Username: chris_spring
Post Number: 248
Registered: 02-2019
| | Posted on Saturday, February 25, 2023 - 03:50 pm: | 


|
Thanks Narrabay2.
I'm a big fan of Louis'. I watch, listen, and learn from every video he puts out.
Cheers! |
    
richarddurgee
Senior Member
Username: richarddurgee
Post Number: 4196
Registered: 11-2001
| | Posted on Friday, March 03, 2023 - 01:09 pm: | 


|
*
If you decide on a gear, I have a few in and out gears, reverse gears and transmissions. Let me know what might work and i'll check what i have and get photos !
* |
    
chris_spring
Senior Member
Username: chris_spring
Post Number: 250
Registered: 02-2019
| | Posted on Friday, March 03, 2023 - 08:49 pm: | 


|
richarddurgee.
Many thanks. I will keep that in mind.
Cheers! |
    
miro
Senior Member
Username: miro
Post Number: 1221
Registered: 11-2001

| | Posted on Thursday, March 09, 2023 - 03:48 pm: | 


|
Chris - I know the feeling well - drilling out that hole on the shaft log.
You have luxury of doing it when the chunk of wood is not in the boat - I had to do mine after I repaired the stern post - not pleasant memories.
But . . .
I practiced a bit - made a very sharp spear point drill out of a twist drill - that was a good 1/2 drill so it was stiff and not likely to bend. The drill was welded to an extension of carbon steel. Drilled out the hole.
Then made a spade drill with a 1/2 in snout that would lead the spade cutters along the right path.
The shaft is 1.125 in diameter. I made the spade drill that diameter, and tested it OK of bore diameter.
I figured the down angle should be 5 degrees. After making the hole and doing some careful measurements, it measured to be 4 1/2 degrees.
I then tried fitting the shaft - - it was tight. I got an adjustable reamer and carefully opened up the hole - small increments, - until I was satisfied with the slightly sloppy fit.
But the whole process required time and patience.
Miro |
    
chris_spring
Senior Member
Username: chris_spring
Post Number: 254
Registered: 02-2019
| | Posted on Thursday, March 09, 2023 - 05:48 pm: | 


|
Hello Miro
This week and next I am working on mocking up the stem in spruce.That way I can figure out the best way to cut the rabbett.
The week following will be when I tackle the keel in spruce. I'm figuring on building the keel in about a half dozen parts using epoxy glue.
Since I will be building up the deadwood anyway, I think I'll build the section containing the propeller shaft tunnel in 3. That way I only have to drill through about 9" of wood at a time.
The three pieces can be joined precisely straight afterward. And with the three pieces complete I can mill them to size and fit them into the deadwood at a 3 degree angle as per the plan. So my job should be way easier than the one you had.
Since I have never built a boat before, the objective is to make all my mistakes in construction grade spruce before moving to the actual oak I will use for the boat. Once I have the plan of attack figured out I simply need to repeat it in oak.
It is way more time consuming but no doubt it will be cheaper.
I have yet to take the decision as to whether I will actually build the boat. The spruce mockups will give me an idea as to whether continuing is within my skill level.
Cheers! |
    
chris_spring
Senior Member
Username: chris_spring
Post Number: 255
Registered: 02-2019
| | Posted on Wednesday, March 15, 2023 - 07:14 am: | 


|
It looks like the build is a go. I'd like to have it in the water in 2024.
I'm continuing to prepare for the build itself which will begin next fall.
Cheers! |
    
miro
Senior Member
Username: miro
Post Number: 1222
Registered: 11-2001

| | Posted on Friday, March 17, 2023 - 09:39 am: | 


|
Ahhh - well, congrats, I think.
My experience with building boats is that you will
(need to ?) become obsessed with the project.
As with everything else there will be hills of elation and valleys of despair.
But you will (I guarantee) be pleased with the outcome.
miro |
    
chris_spring
Senior Member
Username: chris_spring
Post Number: 271
Registered: 02-2019
| | Posted on Saturday, October 07, 2023 - 04:58 pm: | 


|
Early on I set Oct 1 as the start date for the project. Between last March and now the object of the exercise was to accumulate materials and hardware, as well as to pre-build as many components as possible.
The Kingfisher engine threw me a curve. Substantial engine work resulted, but I hope to run it as early as this coming week.
It will then be set aside.
I have accumulated nearly all of the white oak I require, as well as all of the white cedar planking.
For practice I built a stem, keel and transom from construction grade spruce.
All of the forms have been made.
I pre-made a rudder, and roughed out the bulkhead which will fit amidships.
Although the strongback is for all intents and purposes ready to go I am still grappling with how to attach the ceiling hardpoints.
I have cut all of the battens, and built plank and rib steamers.
As well, I've mapped out the project. I have allowed 33 weeks for the build.
According to that plan, the keel should be on the strongback by the end of this month. Molds will be fitted and trued soon after. No doubt that will be problematic, so I've allowed time to deal with it.
The first planks should be on by the end of November.
At least, that's the plan.
Cheers! |
    
andyno
New member
Username: andyno
Post Number: 2
Registered: 10-2023
| | Posted on Thursday, October 12, 2023 - 06:20 am: | 


|
Cool, send me some photos of what you came up with. |
    
chris_spring
Senior Member
Username: chris_spring
Post Number: 272
Registered: 02-2019
| | Posted on Thursday, October 12, 2023 - 07:02 am: | 


|
If people are interested I will post once I have something recognisable on the strongback.
Cheers! |
    
miro
Senior Member
Username: miro
Post Number: 1241
Registered: 11-2001

| | Posted on Friday, October 20, 2023 - 10:13 am: | 


|
So far, it looks like you are getting serious - I found that all my boat projects eventually required me to obsess about it - it was the only way to "git 'er dun"
miro |
    
chris_spring
Senior Member
Username: chris_spring
Post Number: 273
Registered: 02-2019
| | Posted on Friday, October 20, 2023 - 11:08 am: | 


|
The focus this week has been in doing glue ups of the stem and deadwood. I am placing alot of faith in G2 epoxy to permanently bond to oak when submerged. All of the literature and anecdotal evidence I can find says it should be the right stuff.
There is no appreciable change in the strongback status.
I have run the Kingfisher. It has been put away until I'm ready for it.
The Kingfisher will have a Miro 2000 ignition system and run on 12v. The system is built and likewise put away.
Predictably I'm dealing with alignment issues, but I knew that would happen going in.
However, so far everything is on schedule. And yes, this will be an obsession. Obsessions are good.
It is still too ealy for pics.
Cheers! |
    
chris_spring
Senior Member
Username: chris_spring
Post Number: 274
Registered: 02-2019
| | Posted on Tuesday, November 07, 2023 - 03:03 pm: | 


|
This is a bit of an update.
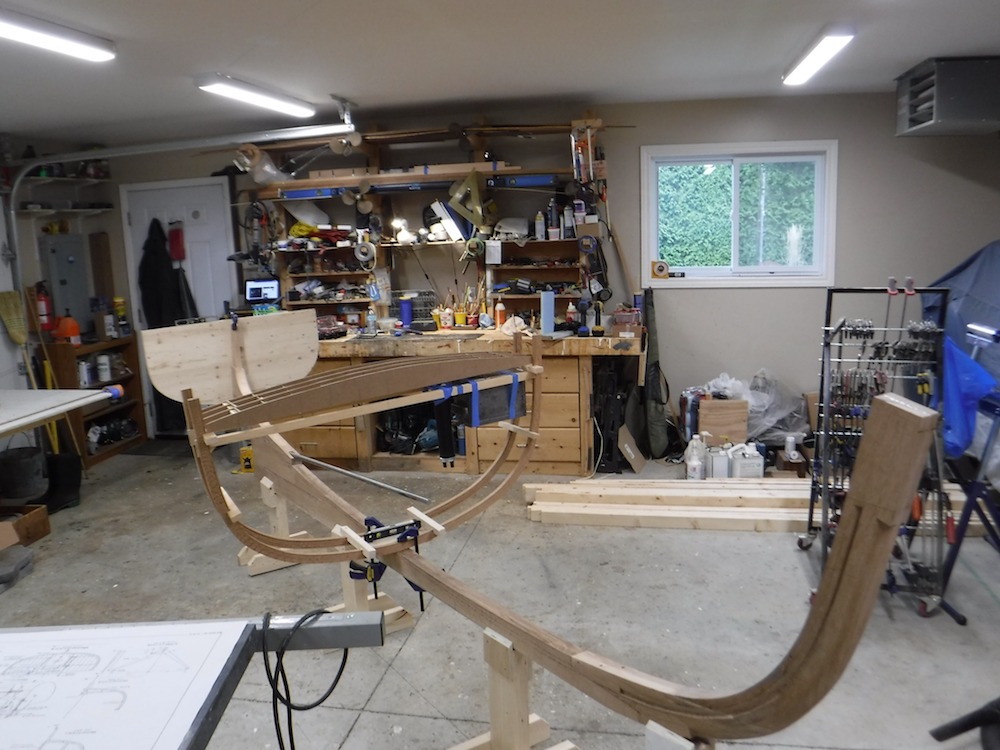
The stem, keel, deadwood, etc are about 90% complete meaning there is only another 90% to go. I've included this pic so you can see where the bulkhead housing the header tank, transfer pump, tiller, ignition system, batteries and chart compartment will go.
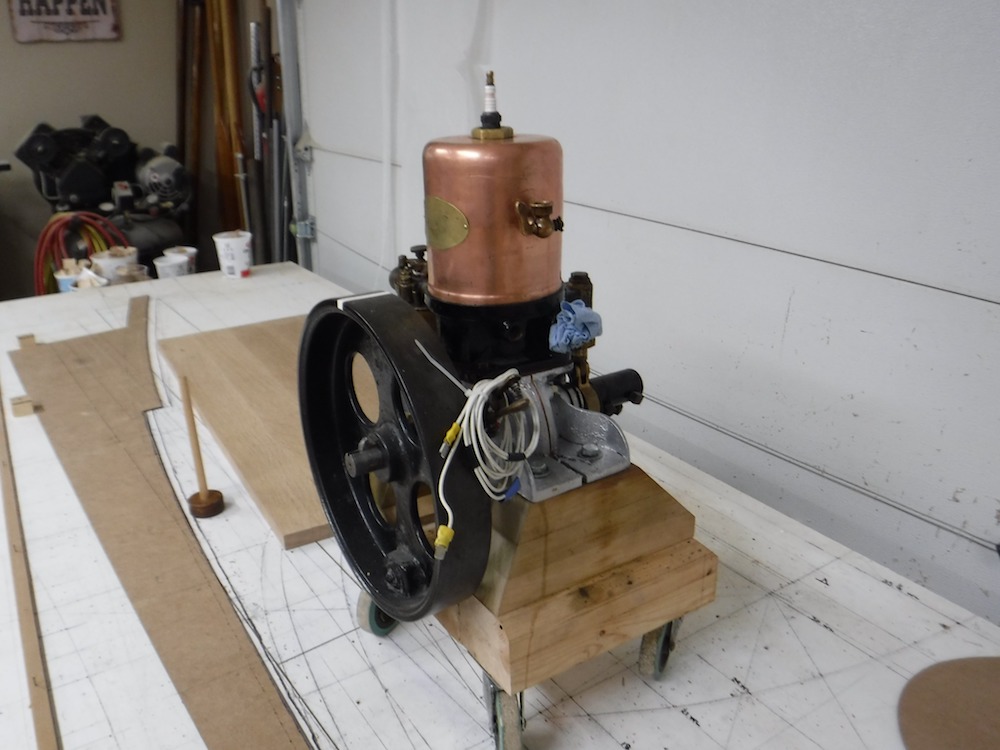
I've also included a pic of the kingfisher. It has one issue. Otherwise it should be good to go.
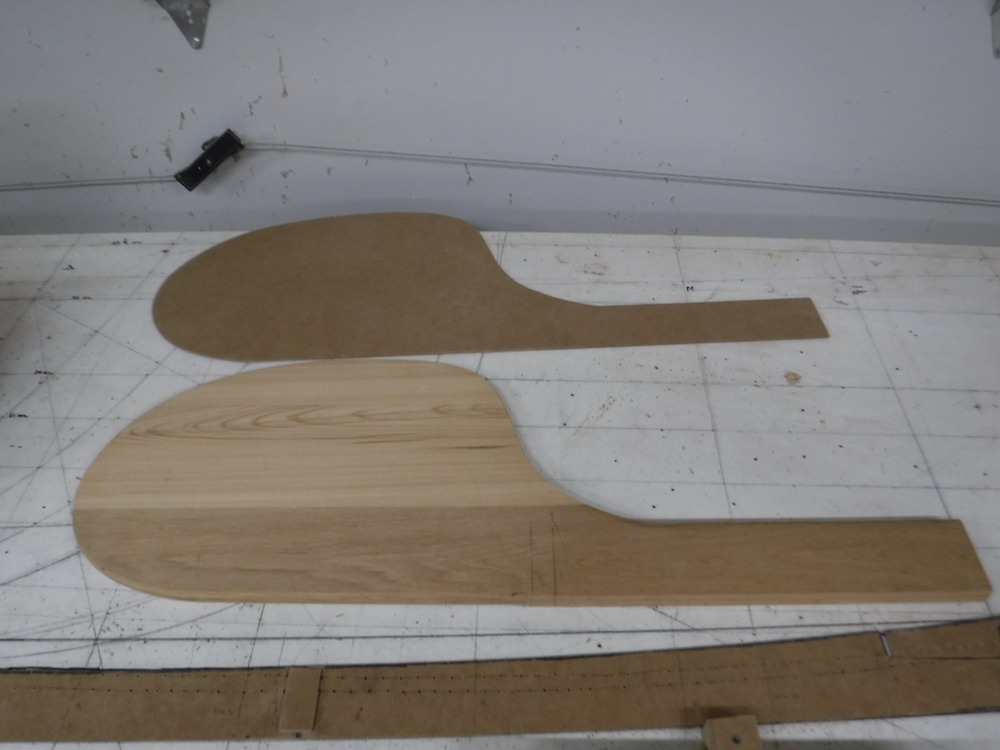
I tried to pre-build as many components as I could prior to actually starting the construction phase of the hull. The rudder has been roughed out and will be completed later.
The transom has a bevel I am having difficulty wrapping my mind around. Therefore I made one out of construction grade spruce that I can make my mistakes on prior to transferring the correct dimensions to the oak blank which is ready to go.
The next steps will be finishing the keel etc and getting it securely fastened to the strongback.
Then the nightmare begins, fitting the forms. I've allowed time in the schedule for what will very likely be a slow, tedious, and frustrating experience. I hope to make headway on that next week.
The plan has always been to be fitting the garboards by the end of the month. We'll see.
Cheers!
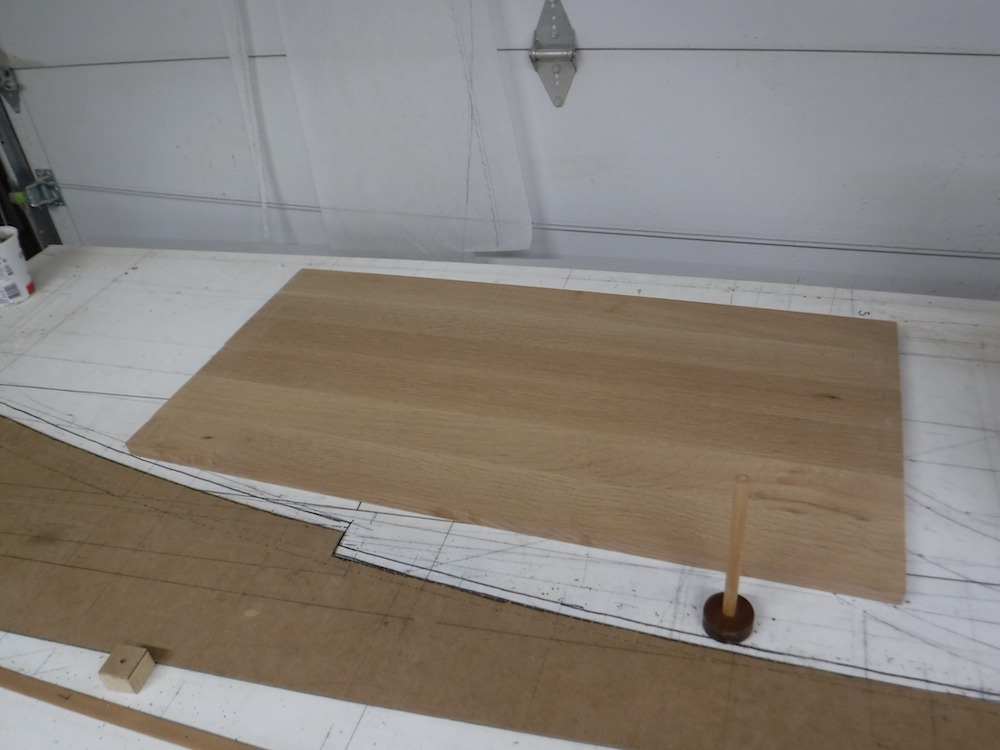
|
    
admin
Board Administrator
Username: admin
Post Number: 99
Registered: 07-2001

| | Posted on Thursday, November 09, 2023 - 04:27 pm: | 


|
Looks great! Impressive project. Keep us posted!
Thanks.
Andrew |
    
chris_spring
Senior Member
Username: chris_spring
Post Number: 275
Registered: 02-2019
| | Posted on Friday, November 10, 2023 - 07:31 pm: | 


|
For your viewing pleasure. Part 1 of 2
https://www.youtube.com/watch?v=tZvfqwb3xgw |
    
chris_spring
Senior Member
Username: chris_spring
Post Number: 277
Registered: 02-2019
| | Posted on Friday, November 10, 2023 - 07:35 pm: | 


|
Part 2 of 2.
https://www.youtube.com/watch?v=dX2pczfx8xk |
    
miro
Senior Member
Username: miro
Post Number: 1242
Registered: 11-2001

| | Posted on Wednesday, November 15, 2023 - 06:18 am: | 


|
Well Chris - you've got a good project ahead of you.
And YES you need to become obsessed with it. That's been your previous experience and mine as well.
But there is a pay-off - when you pull away from that dock it will all be worth it.
miro |
    
chris_spring
Senior Member
Username: chris_spring
Post Number: 278
Registered: 02-2019
| | Posted on Saturday, November 18, 2023 - 04:54 pm: | 


|
Two steps forward. One step backward.
Here are a couple of pics of the molds on the keel. Fitting them will take a lot of trial and error, as well as an extra set of hands.
There is one mold where perhaps either I didn't loft it correctly, or there were a series of errors in the Table of Offsets. Either way, I'll sort it this coming week.
So the pics that show molds of different heights etc, at this point is not a big deal. Hopefully as i fit the molds according to their x, y, and z axes things will come together.
Fitting the molds as I have here has given me an early look at where to expect difficulties. Fortunately I have a fairly well equipped shop with tools to deal with it.
Cheers!
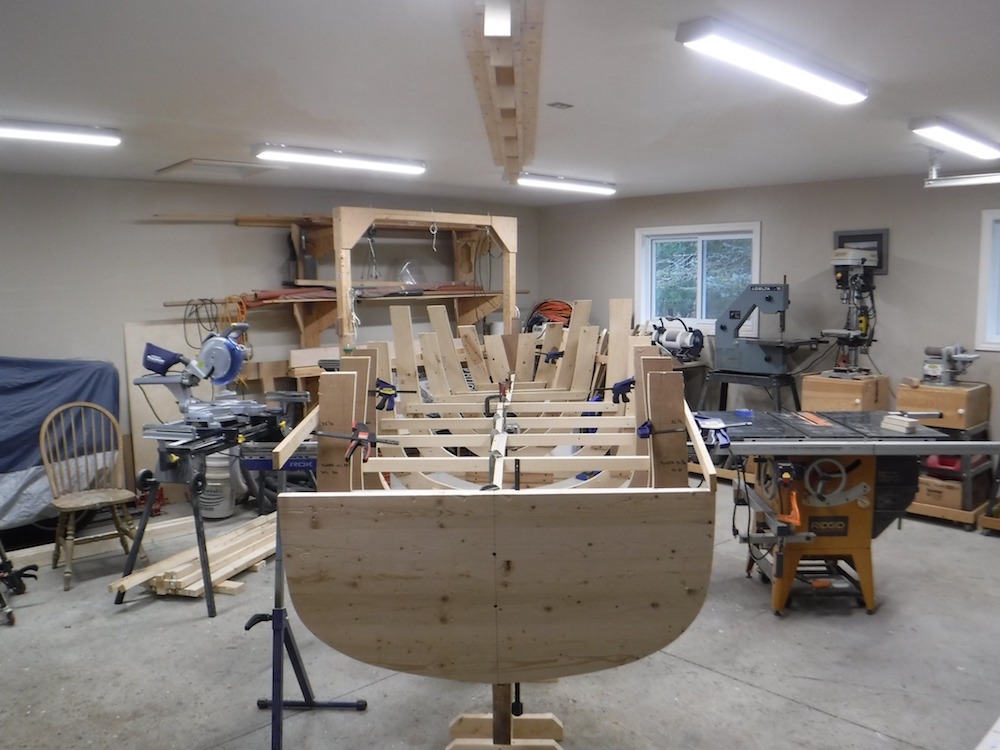
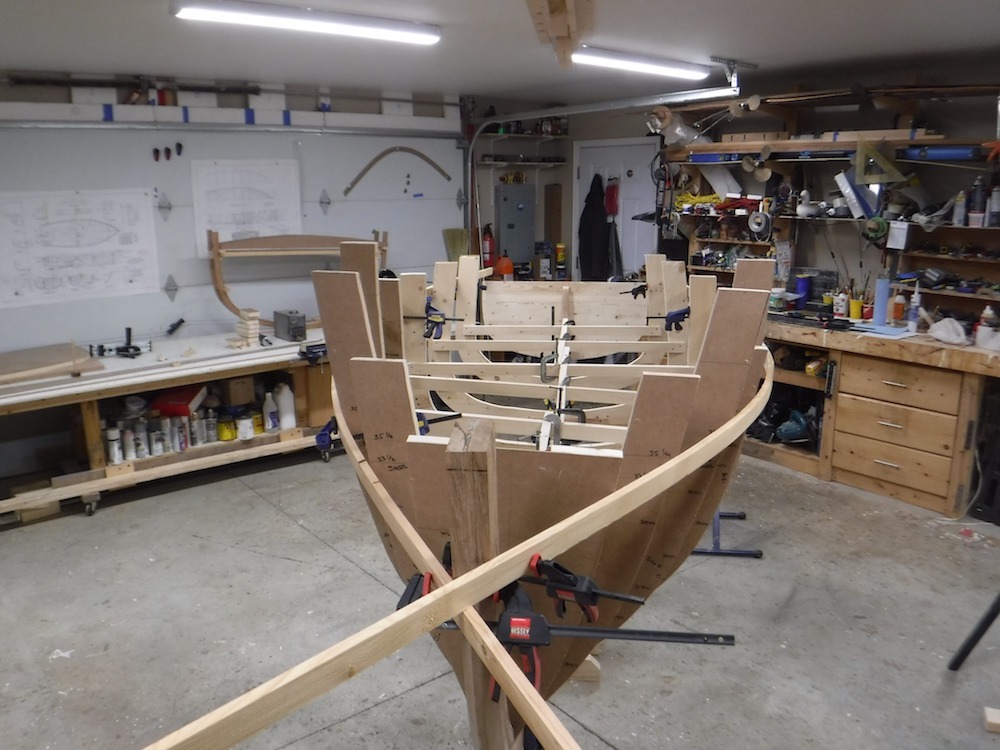
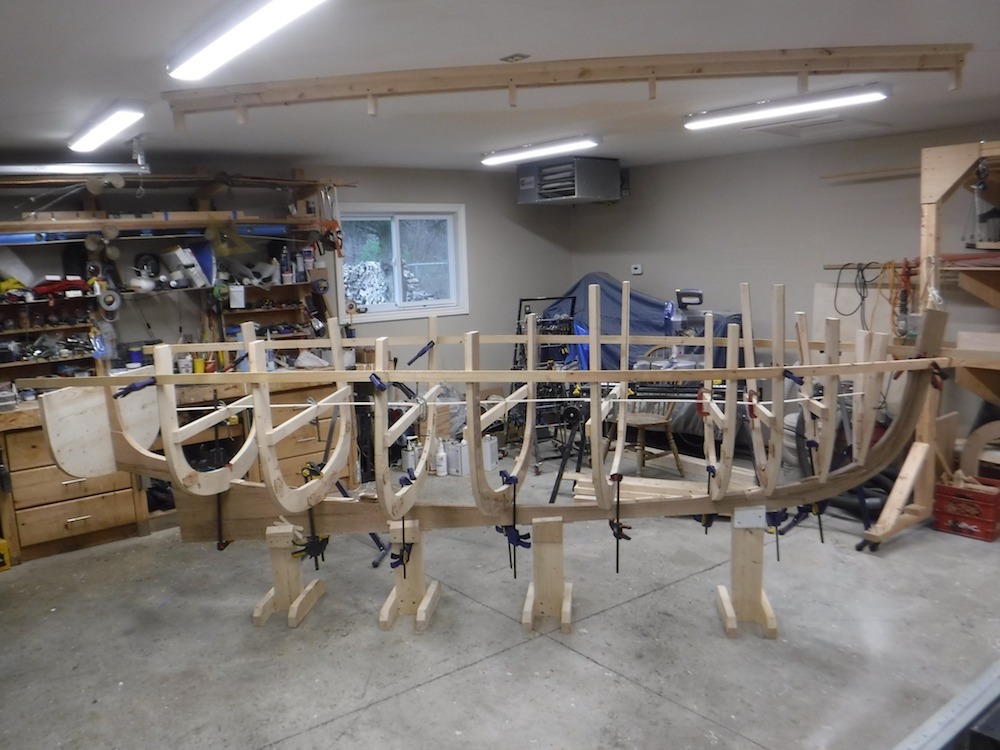 |
    
ned_l
Senior Member
Username: ned_l
Post Number: 239
Registered: 08-2012
| | Posted on Friday, December 15, 2023 - 12:49 pm: | 


|
Very nice! That's a pile of molds for such a small boat, Lol! I was going to suggest there there isn't a critical reason to be so fussy with the fairing, .... until I realized she is carvel planked. Lapstrake & you could have eliminated half the molds & it would have been good.
Do the plans call for an oak transom? That's a bit unconventional for a couple of reasons.
Enjoy the process! |
    
chris_spring
Senior Member
Username: chris_spring
Post Number: 280
Registered: 02-2019
| | Posted on Saturday, December 16, 2023 - 09:54 pm: | 


|
Ned.
Fairing the molds is proving to be a bit of a nightmare.
The construction drawing shows the original had an oak transom.
Cheers! |
    
chris_spring
Senior Member
Username: chris_spring
Post Number: 281
Registered: 02-2019
| | Posted on Friday, December 29, 2023 - 11:07 am: | 


|
https://www.youtube.com/watch?v=HSPrG0C3K4E |
    
chris_spring
Senior Member
Username: chris_spring
Post Number: 282
Registered: 02-2019
| | Posted on Tuesday, January 16, 2024 - 08:10 pm: | 


|
For your viewing pleasure;
Cheers!
https://www.youtube.com/watch?v=LuzOUnjt_58 |
    
chris_spring
Senior Member
Username: chris_spring
Post Number: 285
Registered: 02-2019
| | Posted on Sunday, March 03, 2024 - 02:00 pm: | 


|
Work continues, albeit slowly.
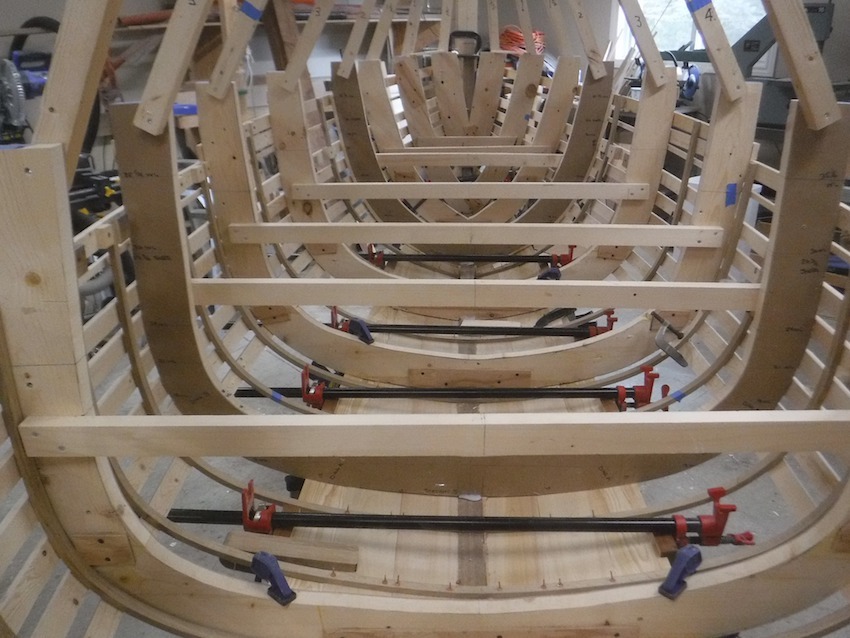
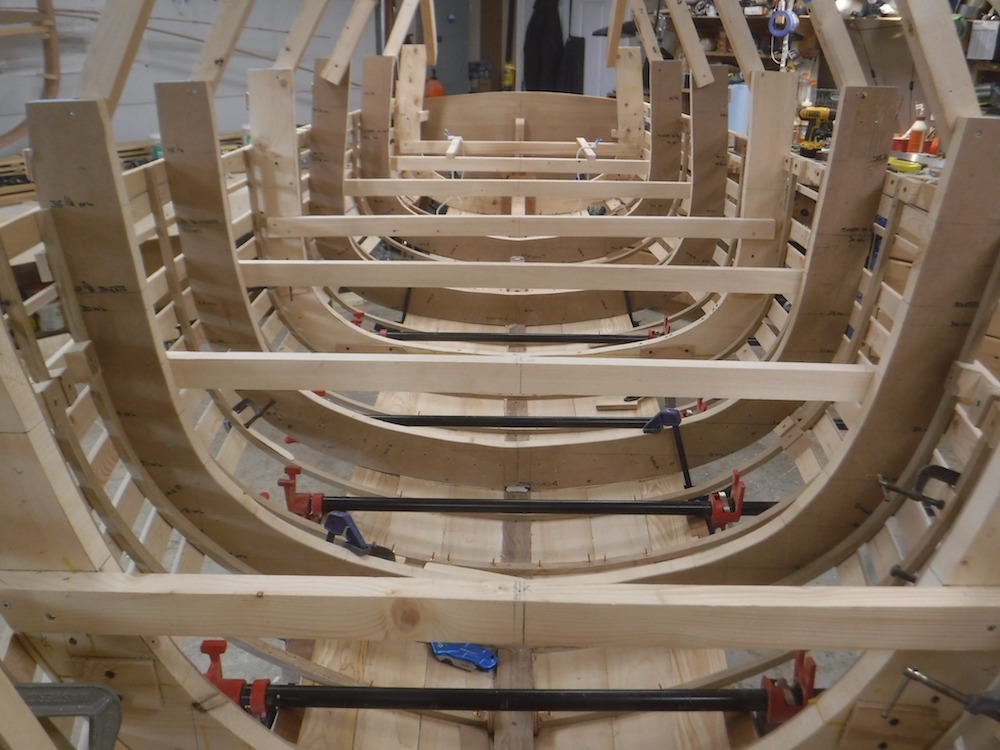
Awaiting an extra set of hands to help me install the next strakes. Once they are on I'll be 1/4 of the way through planking. According to the plan the entire boat should have been planked by mid -February. Oh well. It'll be finished when its done.
The strakes themselves are easy enough to sort. What is difficult is figuring out how thick the plank must be to end up with a finished strake that is 1/2" thick.
The reason for that is that the strakes need to be hollowed in order top conform to the shape at the turn of the bilge. I have a process for that which seems to be working, but shaping the inside of the plank is a bit of a challenge.
Cheers!
Cheers!
 |
    
chris_spring
Senior Member
Username: chris_spring
Post Number: 287
Registered: 02-2019
| | Posted on Sunday, March 24, 2024 - 01:13 pm: | 


|
For your viewing pleasure.
Cheers!
https://www.youtube.com/watch?v=pOq4lllNbkM |
    
miro
Senior Member
Username: miro
Post Number: 1251
Registered: 11-2001

| | Posted on Wednesday, March 27, 2024 - 03:38 pm: | 


|
Progress for sure.
But as I indicated earlier, towards the end, it helps to become obssessd with the boat construction.
Once the planking is done, you're about half way home. |
    
chris_spring
Senior Member
Username: chris_spring
Post Number: 288
Registered: 02-2019
| | Posted on Sunday, April 14, 2024 - 01:07 pm: | 


|
For your viewing pleasure.
Cheers!
https://www.youtube.com/watch?v=i4NF9jEGgG8 |
    
ernie
Senior Member
Username: ernie
Post Number: 2715
Registered: 01-2002

| | Posted on Tuesday, April 23, 2024 - 06:17 am: | 


|
Looking good! |
    
chris_spring
Senior Member
Username: chris_spring
Post Number: 289
Registered: 02-2019
| | Posted on Tuesday, May 28, 2024 - 02:46 pm: | 


|
For your viewing pleasure.
https://www.youtube.com/watch?v=pT7aq36WtRQ
Cheers! |
    
chris_spring
Senior Member
Username: chris_spring
Post Number: 290
Registered: 02-2019
| | Posted on Friday, June 07, 2024 - 04:27 pm: | 


|
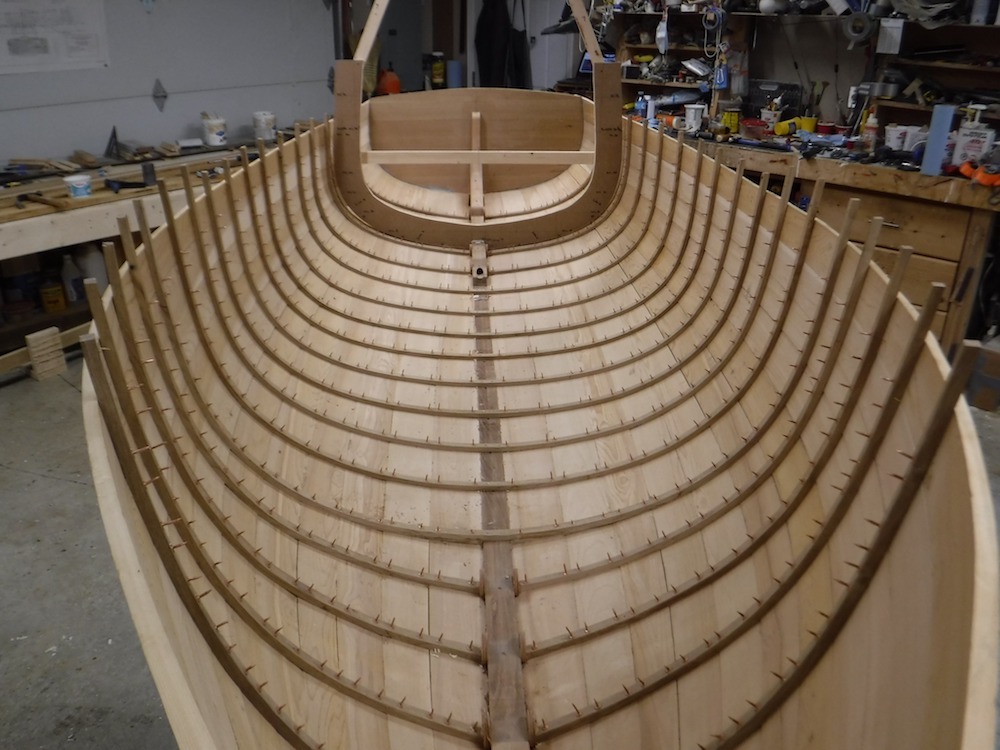
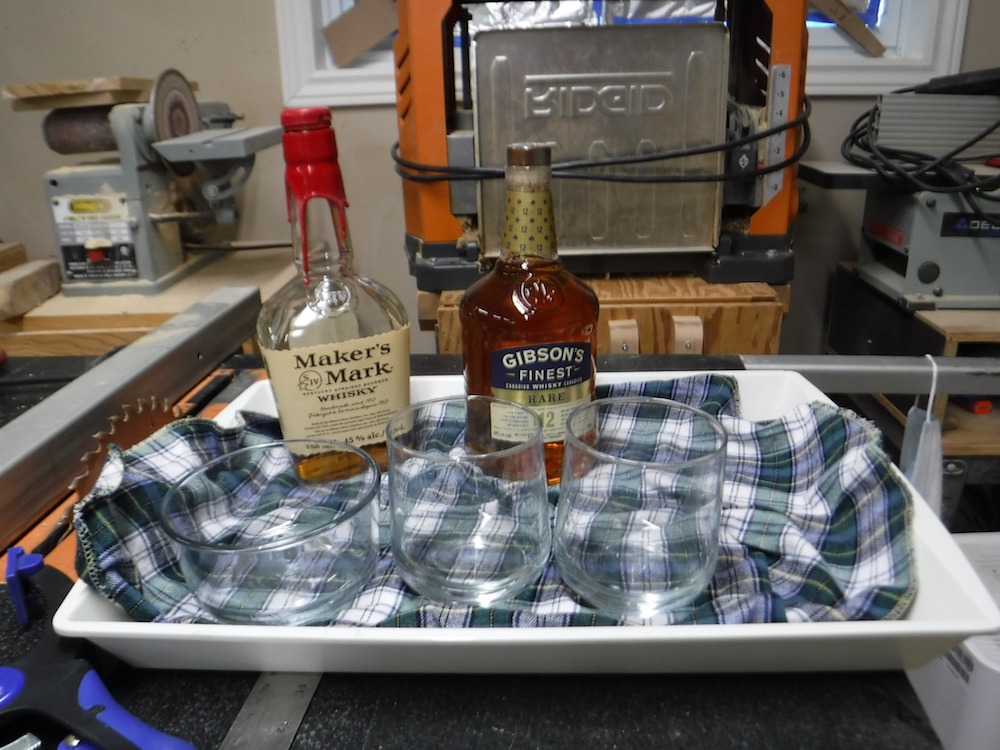
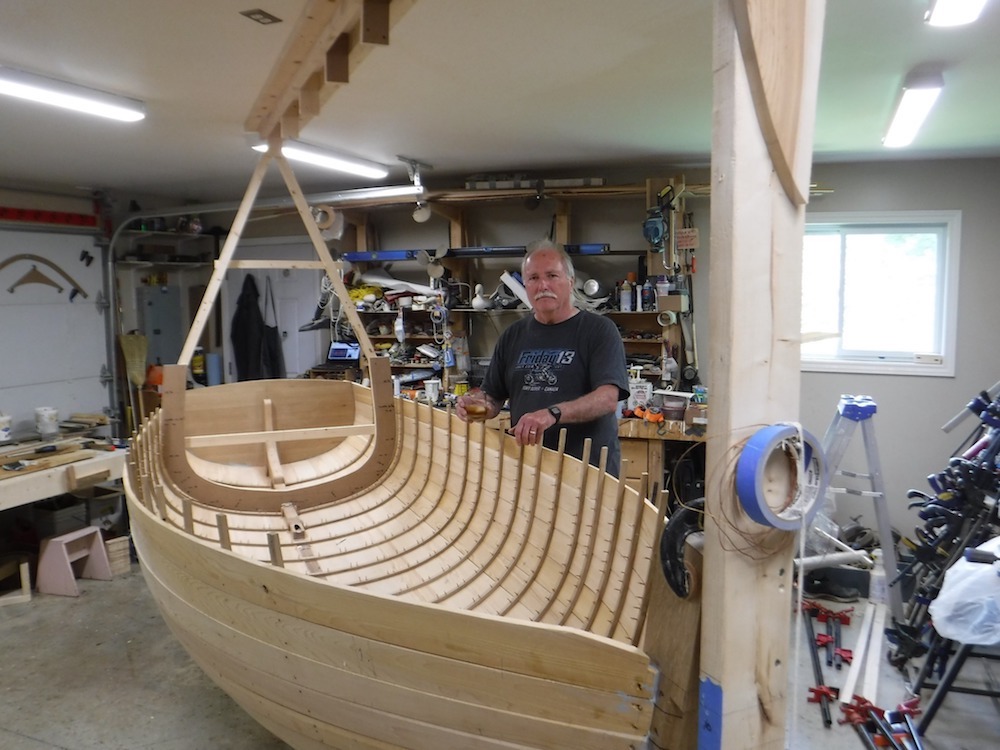
The whiskey plank went on today. I'm now 40% complete, only 90% to go.
Cheers!
 |
    
ernie
Senior Member
Username: ernie
Post Number: 2718
Registered: 01-2002

| | Posted on Thursday, June 13, 2024 - 08:57 pm: | 


|
Chris,
Incredible!
Ernie |
    
chris_spring
Senior Member
Username: chris_spring
Post Number: 295
Registered: 02-2019
| | Posted on Monday, August 12, 2024 - 07:03 pm: | 


|
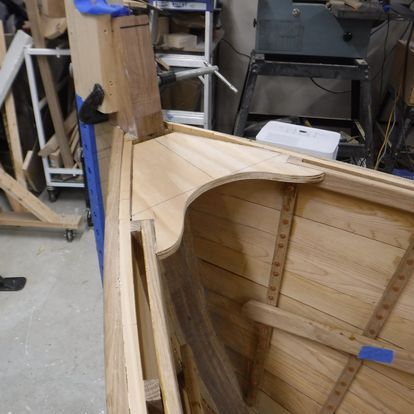
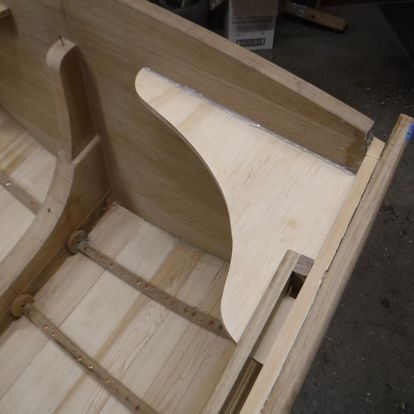
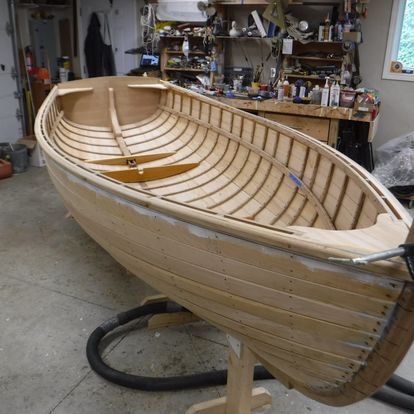
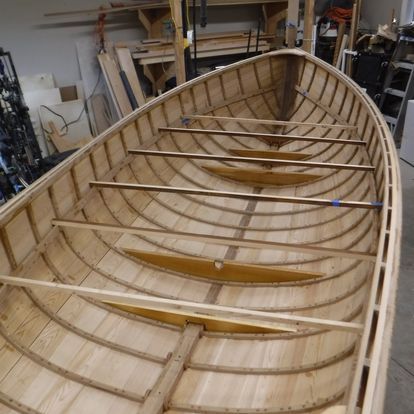
Work continues.
A temporary breasthook, knees and thwarts have been installed so I can flip the hull to fair and finish it. That work will likely not begin until about October.
Cheers!
 |
    
chris_spring
Senior Member
Username: chris_spring
Post Number: 296
Registered: 02-2019
| | Posted on Wednesday, August 14, 2024 - 08:35 am: | 


|
Once again, for your viewing pleasure.
Cheers!
https://www.youtube.com/watch?v=6JXQvYPxBkc |
    
miro
Senior Member
Username: miro
Post Number: 1262
Registered: 11-2001

| | Posted on Tuesday, August 20, 2024 - 05:36 pm: | 


|
Yup - it's coming along - nice to see the progress
Miro |
    
chris_spring
Senior Member
Username: chris_spring
Post Number: 298
Registered: 02-2019
| | Posted on Wednesday, October 23, 2024 - 02:00 pm: | 


|
For your viewing pleasure.
I expect the hull to be on the dolley by the end of the month. I can then begin interior work.
https://www.youtube.com/watch?v=JEvaap2cAz8
Cheers. |
    
ernie
Senior Member
Username: ernie
Post Number: 2734
Registered: 01-2002

| | Posted on Friday, October 25, 2024 - 08:18 am: | 


|
Chris,
That looks so nice I would be afraid to touch it. Chuckle chuckle
Ernie |
    
miro
Senior Member
Username: miro
Post Number: 1265
Registered: 11-2001

| | Posted on Wednesday, November 13, 2024 - 06:35 pm: | 


|
I think you'll find that there's quite a bit of pressure on the rudder so you gotta make it strong.
But the hull looks fantastic.
I also found that a flat rudder works OK but one that has a bit of a symmetric airfoil shape in cross section works better.
Congrats on the work done thus far. |
    
chris_spring
Senior Member
Username: chris_spring
Post Number: 299
Registered: 02-2019
| | Posted on Thursday, November 14, 2024 - 04:58 am: | 


|
Thanks for the pointers Miro. Rudder strength is a concern for sure.
The leading edge and back about 3" is white oak. The rest is Doug fir since I had it on hand. The whole thing has a quasi laminar flow airfoil on it. The leading edge at its thickest is 3/4". The trailing edge is less than 1/2" It also tapers by the same amounts top to bottom.
The whole thing has been fibreglassed.
An issue will be whether the gudgeons and pintles will be strong enough. I bought a set intended for something like a Laser sailboat. We'll see if they'll be strong enough? If not, making new is not a big deal.
Right now the focus is on quarter knees andbreasthook.
Cheers! |
    
chris_spring
Senior Member
Username: chris_spring
Post Number: 301
Registered: 02-2019
| | Posted on Sunday, December 15, 2024 - 08:30 am: | 


|
Still plodding along.
I will give the hull interior a quick sand. Then it will be time to varnish. I am anticipating 5 coats which will likely take me a couple of weeks to complete.
After that it will be time to build the engine mount and install the engine. Once those are done I can send the propellor shaft out for machining and mock up the main fuel tank.
I will need to contract someone to build the fuel tank. That will no doubt be pricey.
The main fuel tank will have a filler, a vent line, a shutoff, a drain, and a fuel line. The main tank will be vented through the header tank. As fuel is transferred from the main to the header, to prevent overflow, any excess fuel will be returned to the main tank via the vent line.
The header will also be vented. In addition to the vent line to the main tank, it will have an output line from the transfer pump, a shutoff, and a gravity feed line to the carburetor.
It is all coming along, albeit slowly. Miro nailed it when he said words to the affect that to complete a project such as this it must become an obsession.
Cheers!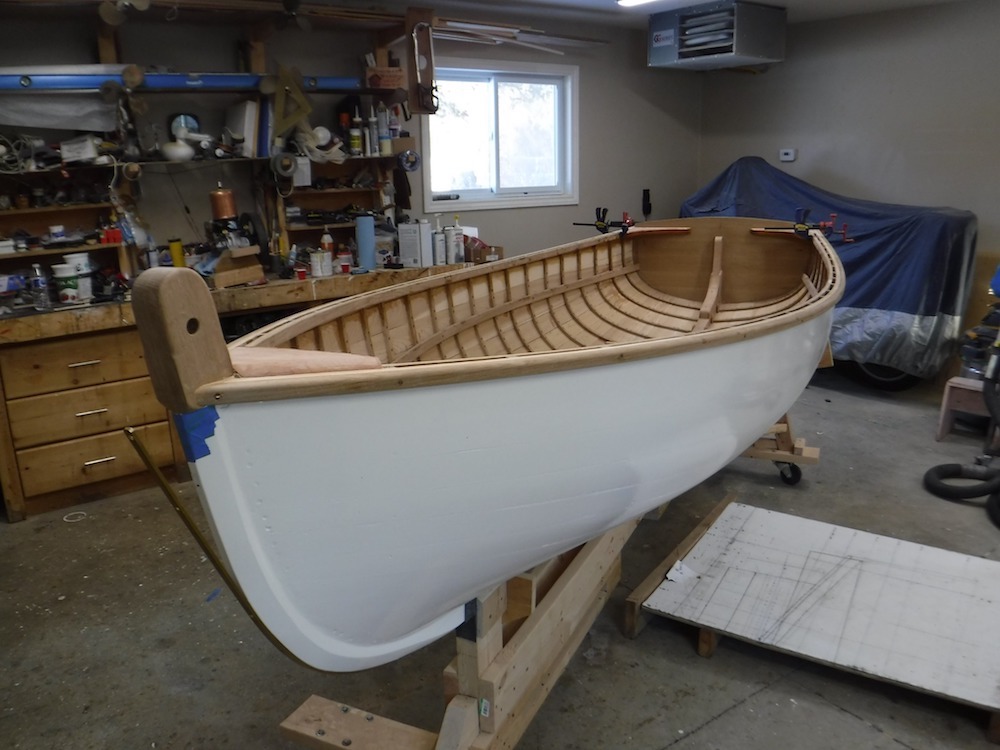 |
    
ernie
Senior Member
Username: ernie
Post Number: 2737
Registered: 01-2002

| | Posted on Monday, December 16, 2024 - 07:04 pm: | 


|
Chris,
What beautiful launch!
Ernie |
    
chris_spring
Senior Member
Username: chris_spring
Post Number: 302
Registered: 02-2019
| | Posted on Friday, December 20, 2024 - 06:44 pm: | 


|
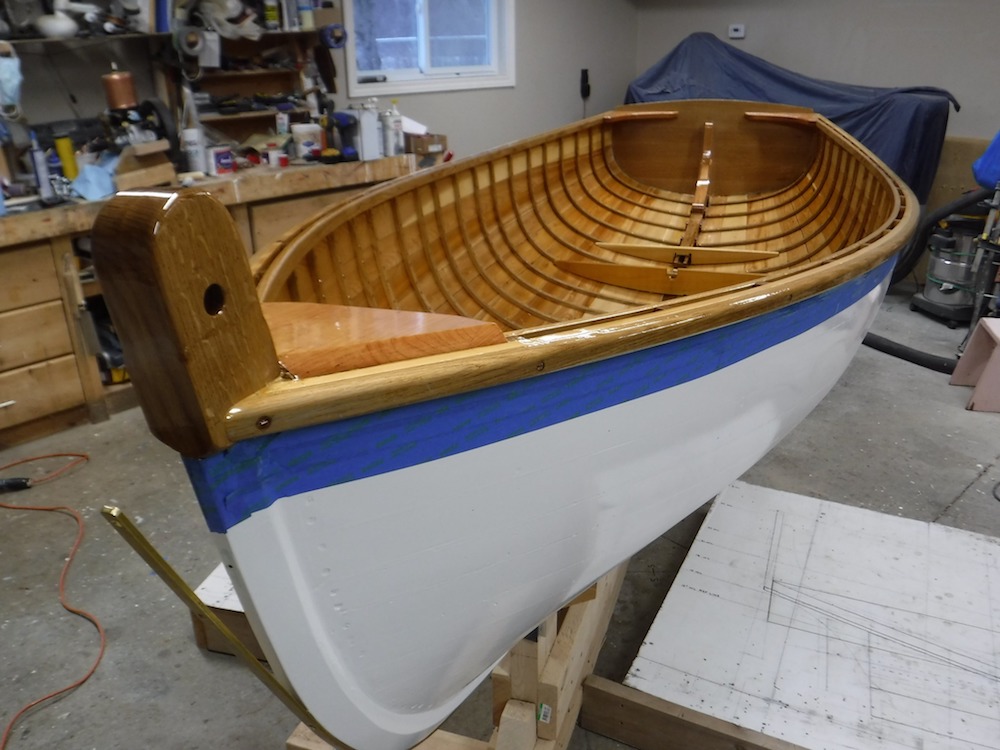
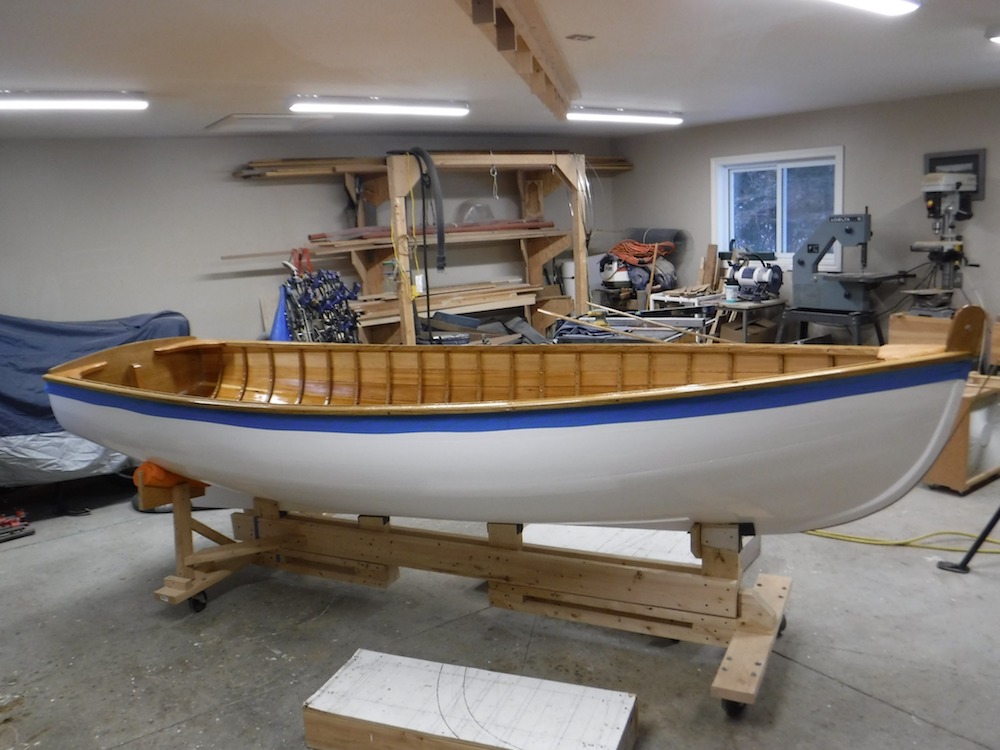
Three coats of varnish are on. I am planning on applying five.
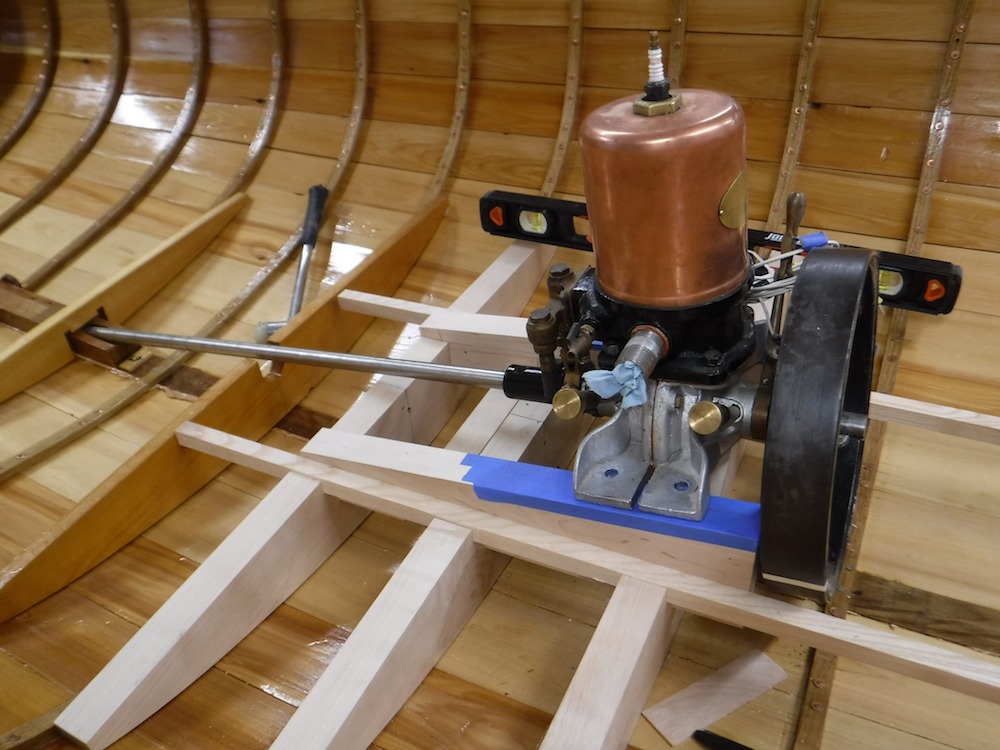
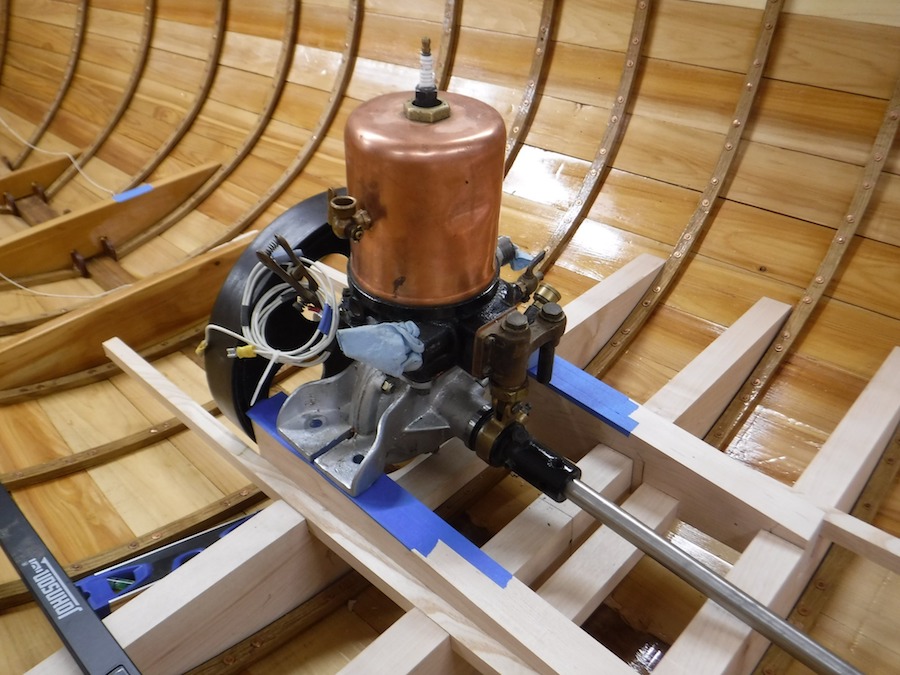
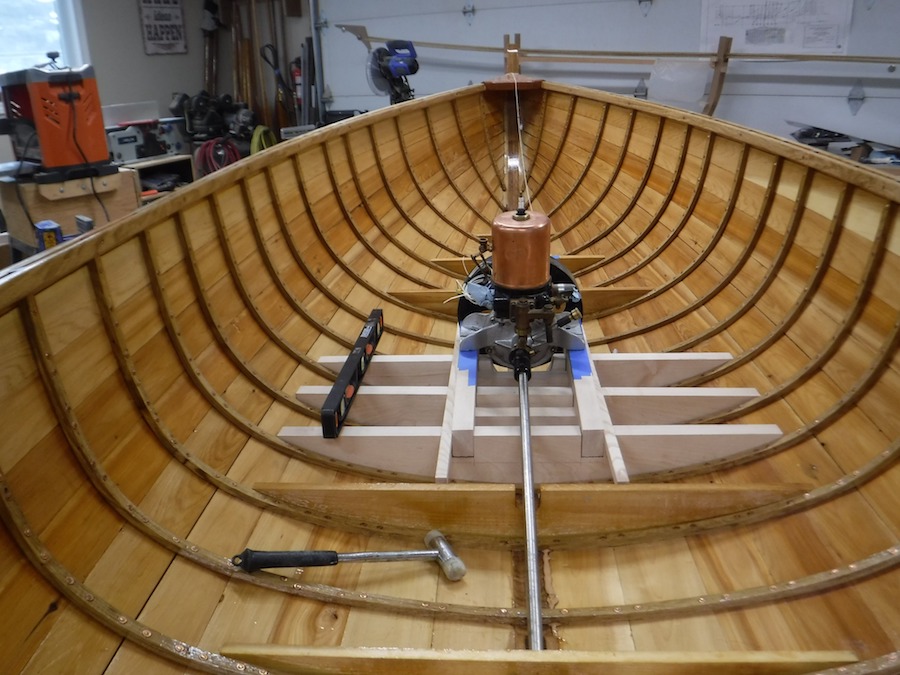
You can see the Kingfisher in the background of the second pic. It will be installed in January.
Cheers!

Cheers! |
    
chris_spring
Senior Member
Username: chris_spring
Post Number: 303
Registered: 02-2019
| | Posted on Wednesday, January 01, 2025 - 02:10 pm: | 


|
Happy New Year.
This week I am fitting the engine. So far. so good.
Cheers!
 |
    
chris_spring
Senior Member
Username: chris_spring
Post Number: 304
Registered: 02-2019
| | Posted on Wednesday, January 15, 2025 - 08:29 pm: | 


|
https://www.youtube.com/watch?v=jPGQzqJNmvQ&t=46s |
    
miro
Senior Member
Username: miro
Post Number: 1267
Registered: 11-2001

| | Posted on Wednesday, January 29, 2025 - 05:26 am: | 


|
Oh oh - maple for an engine mount? ?
It might be OK for a few years, but it won't last nearly as long as white oak. If any of the maple gets soft, it will not last long.
I guess, about the only other thing to do is soak the maple in preservative for several weeks.
But for sure, using white oak (not red oak! ) would be much better. And even with that I would stiff give it a good soaking in preservative.
I use e zinc napthanate stuff - Pentox
Miro |
    
chris_spring
Senior Member
Username: chris_spring
Post Number: 305
Registered: 02-2019
| | Posted on Monday, February 03, 2025 - 09:42 am: | 


|
Ya. I thought about the maple thing. What I came up with is that this boat is not intended to last 100 years. It is for my use. I will reach my sell by date long before maple becomes and issue,
Cheers! |
    
chris_spring
Senior Member
Username: chris_spring
Post Number: 307
Registered: 02-2019
| | Posted on Saturday, April 12, 2025 - 07:35 pm: | 


|
And that's enough for one day.
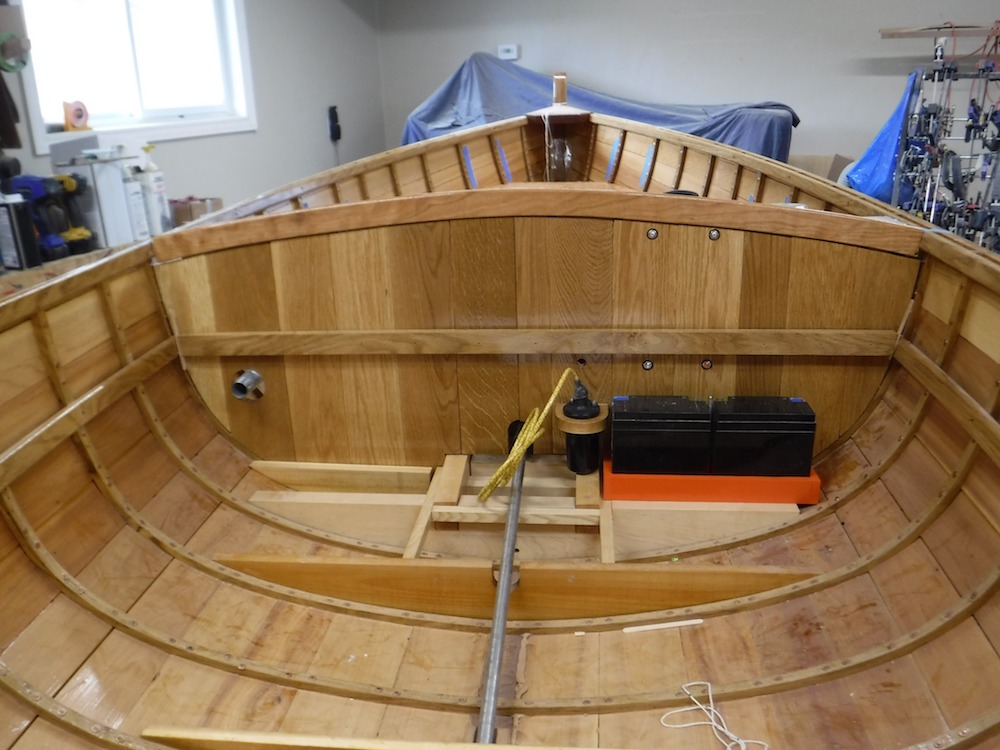
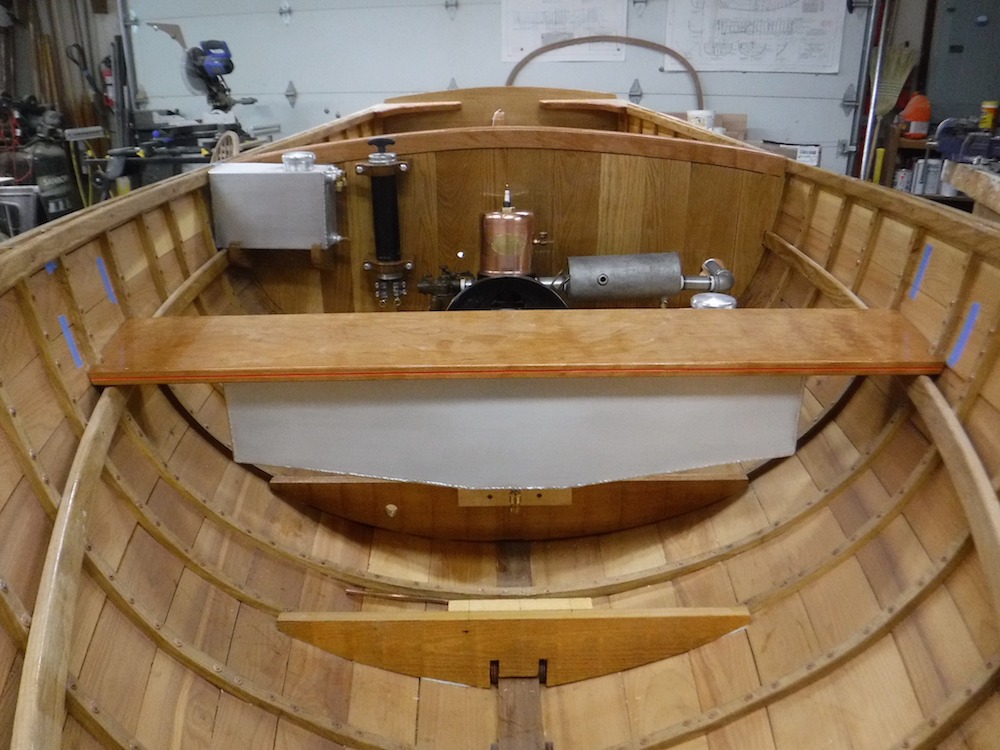
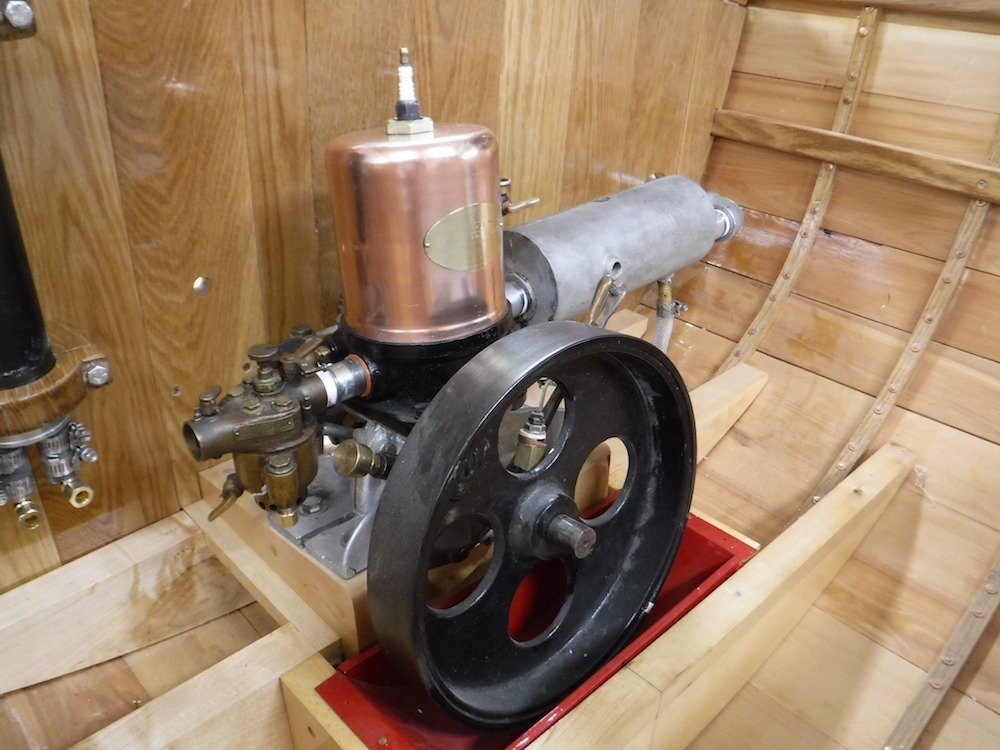
The bulkhead is just about ready for permanent installation. After that I'll work from the bulkhead forward including plumbing and electrical. Then I'll work from the bulkhead aft which will include steering and exhaust.
On top of that I put a little elbow grease into polishing the copper jacket on the Kingfisher.
Cheers!
 |
    
chris_spring
Senior Member
Username: chris_spring
Post Number: 308
Registered: 02-2019
| | Posted on Tuesday, April 15, 2025 - 11:39 am: | 


|
For your viewing pleasure.
Cheers!
https://www.youtube.com/watch?v=d4g2qj3OWKs |
    
miro
Senior Member
Username: miro
Post Number: 1272
Registered: 11-2001

| | Posted on Sunday, April 20, 2025 - 09:22 am: | 


|
Well Chris, it's turning out pretty well - I like the spaciousness of the boat. There's not usually all that much room in the boats powered by these small old marine engines.
How soon will the inside of the hull get christened with small black oily spots?
Congrats on all of the work you've done.
miro |


