| Author |
Message |
    
John Treloar
Member
Username: johntr
Post Number: 22
Registered: 10-2005
| | Posted on Sunday, April 17, 2016 - 07:28 pm: | 


|
I have oil and gas leaking from the join between the base plate (sump) and the section with the grease cups. There seems to be a gasket there, but if I tighten down the bolts, the engine doesnt rotate freely. What sort of gasket should I have and what thickness? Otherwise the engine is running well although a little rich. Any help appreciated.
I did also enjoy being at the Classic and Wooden Boat Show over the weekend. I met Boyd Myer and others. Very enjoyable. |
    
Greg Y
Senior Member
Username: gregoryan
Post Number: 137
Registered: 09-2004

| | Posted on Sunday, April 17, 2016 - 08:31 pm: | 


|
These are shim/ packing gaskets, meaning that there may be many layers and thicknesses to make the crank main bearings just the right clearance. It sounds like you only need 1 or 2 more paper thicknesses. All engines differ to the total thickness needed. Very fiddly, but do-able. the upside is that when the bearings wear -these shim gaskets can be removed to take up the play. You can make them from paper [ i dont know that it has to be anything special?] note that their edge alongside the main shaft has to be Dead straight & touching the shaft neatly - otherwise the crankcase compression will find its way along the gap! You will have to take the top half crank case [ and everything above it] off. You can use your spare upper case as a template to make the paper shims at home. |
    
John Treloar
Member
Username: johntr
Post Number: 23
Registered: 10-2005
| | Posted on Tuesday, April 19, 2016 - 11:12 pm: | 


|
Greg, I assume you mean gasket paper? It comes in different thicknesses. What would you suggest I start with? I can use the other parts I have the cut the gasket. I assume no goo or other stuff to use, just the gasket? |
    
Greg Y
Senior Member
Username: gregoryan
Post Number: 138
Registered: 09-2004

| | Posted on Wednesday, April 20, 2016 - 01:28 am: | 


|
It's a very fine line between *tightening the case causing non-free turning , &&& * clamping the main shaft completely tight!
I doubt real gasket paper would come thin enough these days [?].
It maybe a delicate job preserving the current gaskets, try to get a thin blade to separate the top half-case from the top gasket. Hopefully the current ones will stay stuck to the bottom case.
Try One layer of ordinary paper on top of your existing gaskets.
[of course the gaskets are mirror image- pairs] you must
then bolt the top case back down and feel the rotation, repeat if still dragging.
. I've used ordinary paper before [along with thicker gasket material]
Its a low temp, low pressure/vac application, surely paper wont rot, sandwiched in there.
Punch the bolt holes oversize so you can push the straight side of paper against shaft.
No goo, as you want provision to remove a layer in another 100,000 Miles.
You'll need help - [in the boat] with that Huge Cylinder reinstalling!
You can leave the crank in situ, be aware the weight of the flywheel wants to tip forward. Note timing positions before removing mag drive. |
    
Andrew Munns
Senior Member
Username: johnoxley
Post Number: 157
Registered: 04-2010
| | Posted on Wednesday, April 20, 2016 - 05:32 pm: | 


|
Hi - Try drafting cartridge paper with a coating of oil on install - a little thicker and stronger to take compass points and lines from hard (6H) pencils. Not the flimsy plan printing paper though. Try office suppliers? Perhaps an A3 art process diary? Manila folders / thin card OK.
You can try proper oil jointing from auto suppliers but overkill.
The grease cups will introduce grease where it is needed for sealing - Also remember to pump in grease at the end of a run if the boat is stored afloat - stops high bilge level from entering sump. |
    
John Treloar
Member
Username: johntr
Post Number: 24
Registered: 10-2005
| | Posted on Thursday, April 28, 2016 - 02:00 am: | 


|
I will go forward this weekend with suggestions above. I was speaking to Graham Davis from near Bathurst who sold me the engine and parts. He suggested a very thin neoprene gasket. Would either recommend this? |
    
Greg Y
Senior Member
Username: gregoryan
Post Number: 139
Registered: 09-2004

| | Posted on Thursday, April 28, 2016 - 05:36 am: | 


|
Oh Boy! I dunno, this brings up more questions and feasibility theories than are worth putting forward |
    
lloyd
New member
Username: lloydsboats2
Post Number: 2
Registered: 06-2016
| | Posted on Wednesday, June 01, 2016 - 08:02 am: | 


|
Gentelmen ...I just posted.. theres a couple actually 3 seadogs including a big super twin for sale in WA guys names chester ....08 982 124 55 the adds on gumtree heading was vintage inboard parts regards lloyd
also gasket paper comes in very thin thickness also try blackwoods |
    
John Treloar
Member
Username: johntr
Post Number: 25
Registered: 10-2005

| | Posted on Sunday, January 15, 2017 - 09:54 pm: | 


|
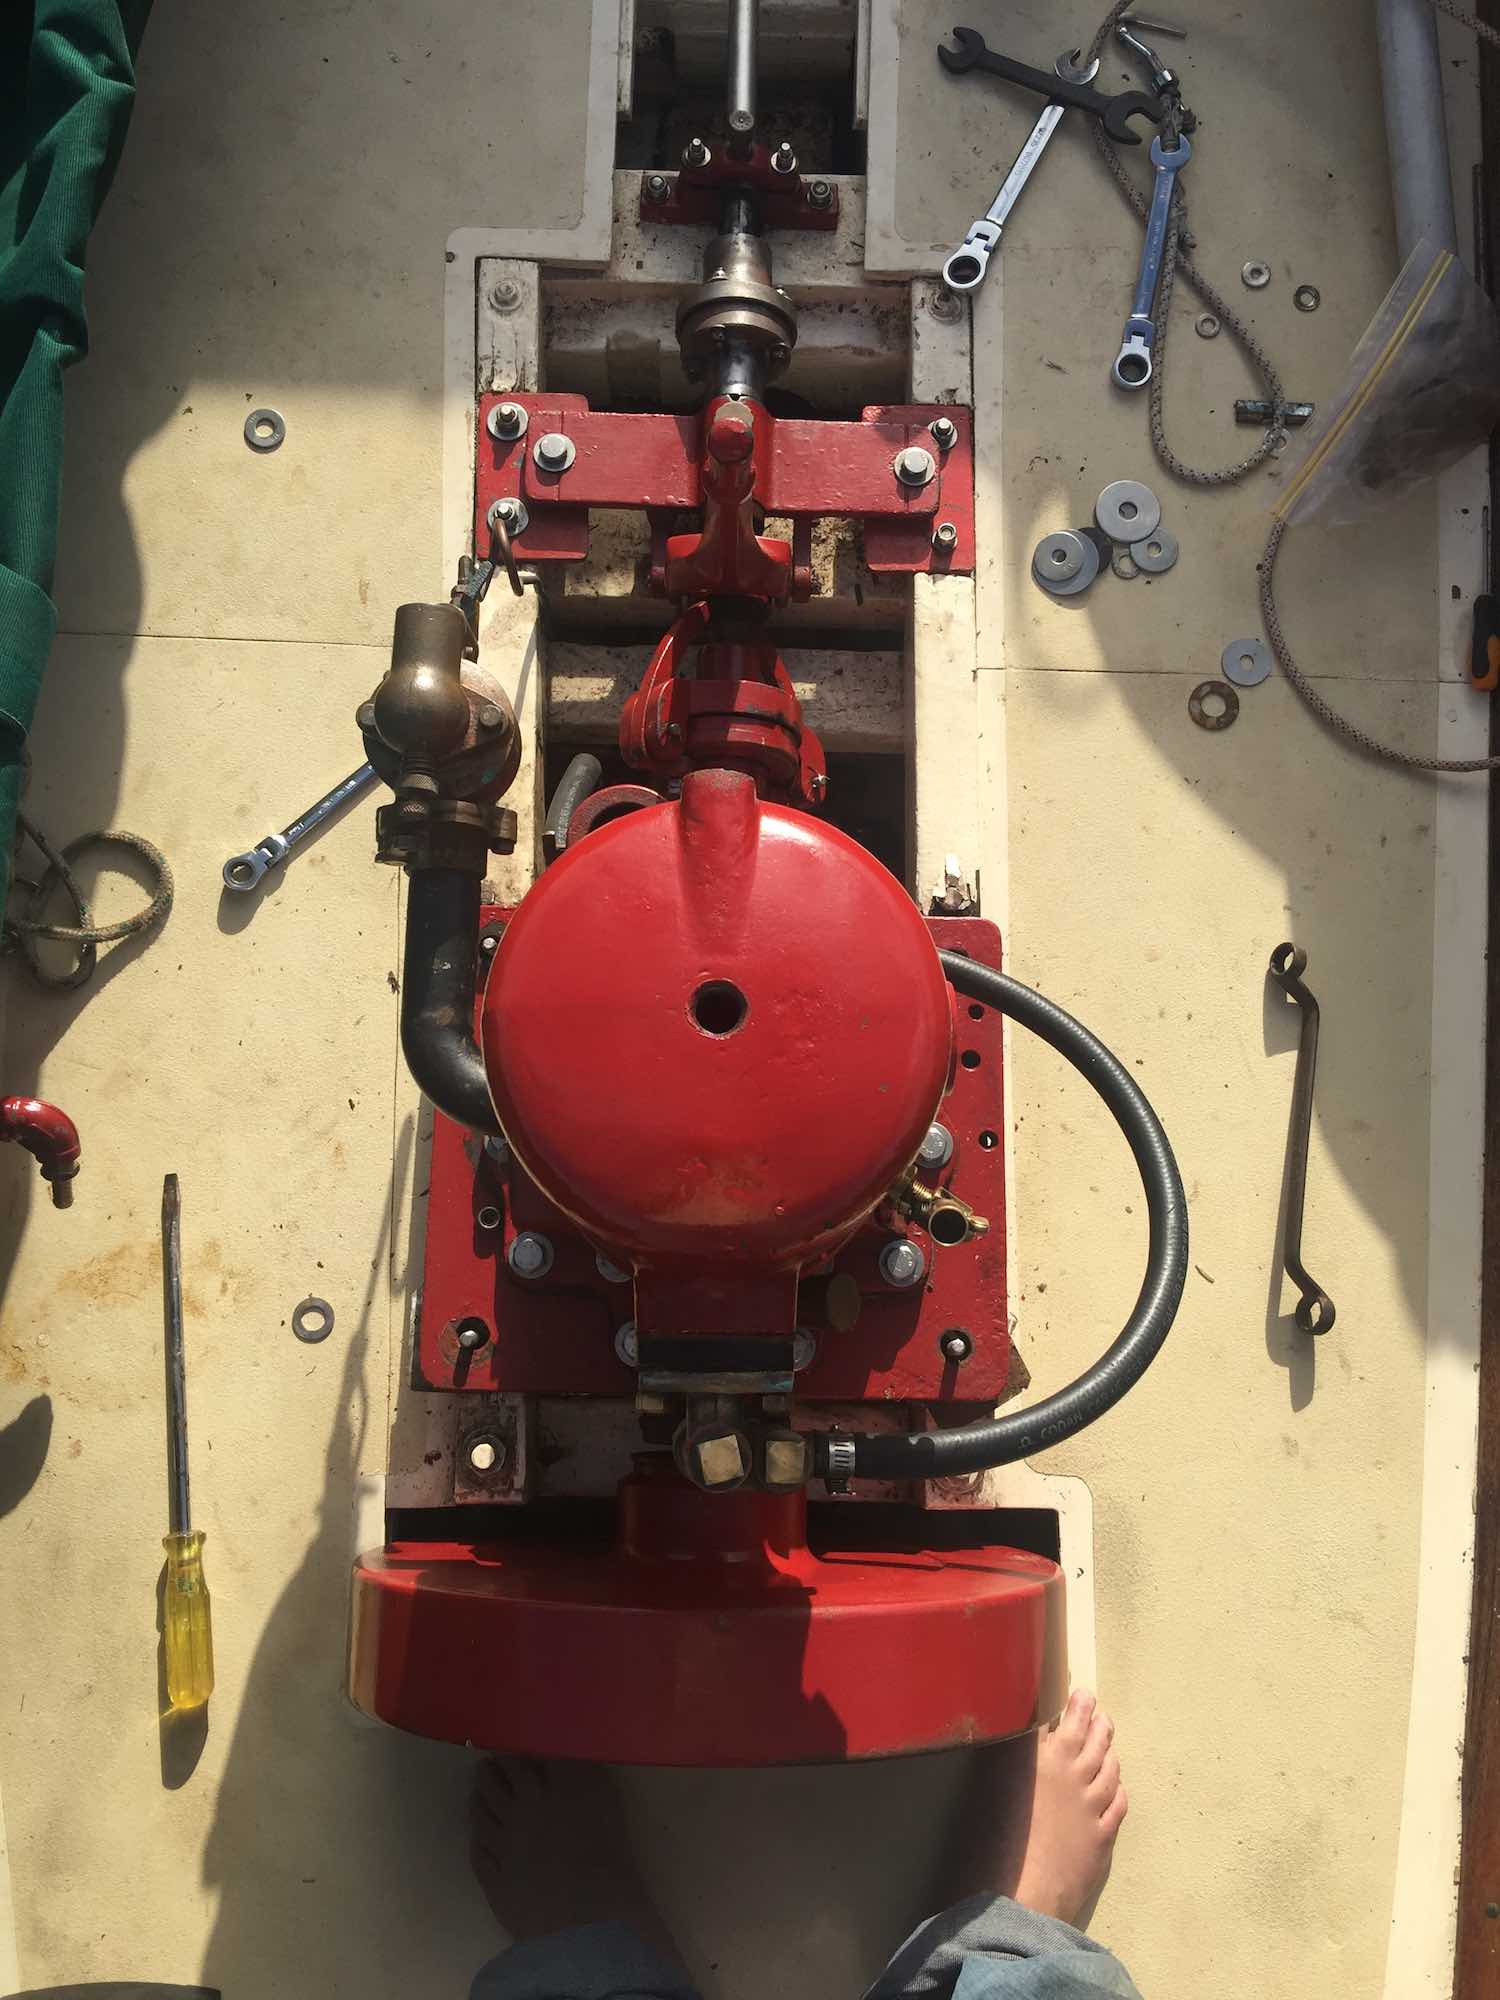
I have completed the repair of the leaking gaskets in the Seadog. The engine runs very freely when no compression and plug out. When running no leaks anymore and running smoothly. I removed the original gaskets (gently) and recut a thin gasket for each side and replaced into the boat. Little bit of effort, but good result. Also replaced the old bolts with new SS ones. Looks good. Works well. |
    
John Treloar
Member
Username: johntr
Post Number: 26
Registered: 10-2005

| | Posted on Sunday, January 15, 2017 - 10:50 pm: | 


|
I also realigned the whole engine while I was at it from the prop shaft right through to the engine. Whole system now aligned up and down and left and right. Everything running freely now.

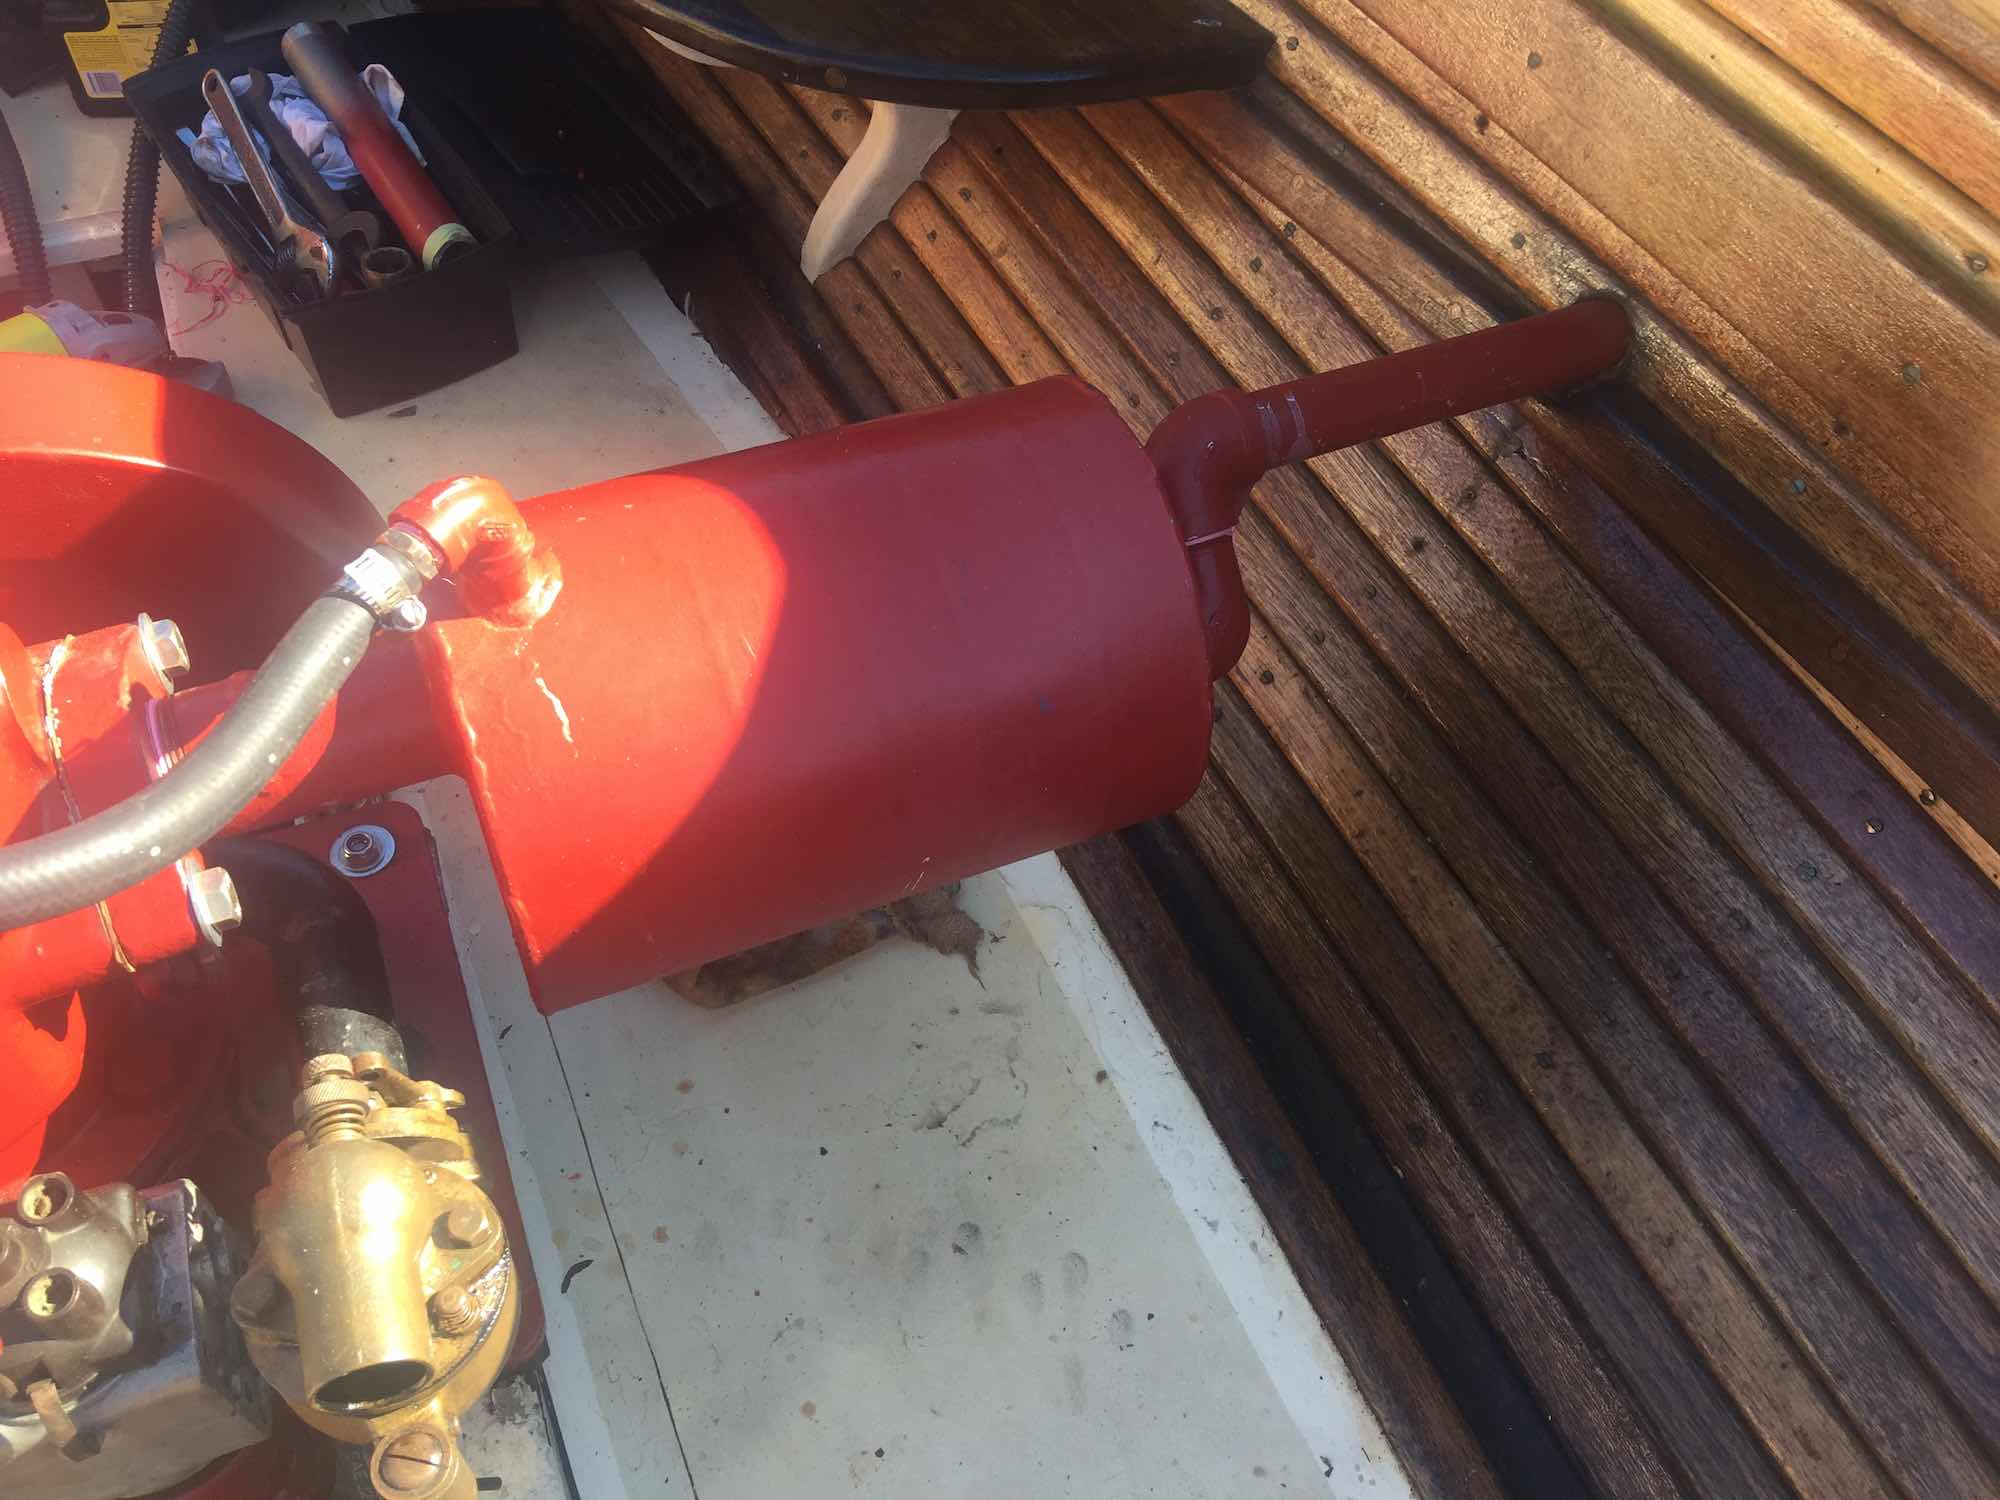
After aligning I also added the replacement Exhaust. It is a copy in SS of the original cast iron exhaust. Sounds good and operates flawlessly.
 |
    
John Treloar
Member
Username: johntr
Post Number: 27
Registered: 10-2005

| | Posted on Sunday, January 15, 2017 - 10:50 pm: | 


|
I also realigned the whole engine while I was at it from the prop shaft right through to the engine. Whole system now aligned up and down and left and right. Everything running freely now.
After aligning I also added the replacement Exhaust. It is a copy in SS of the original cast iron exhaust. Sounds good and operates flawlessly.
|
    
Greg Y
Senior Member
Username: gregoryan
Post Number: 143
Registered: 09-2004

| | Posted on Monday, January 16, 2017 - 10:50 pm: | 


|
VeRRy Good and thorough! Yes its quite a task , delicate getting those shims right, especially onboard a moored boat, in the baking sun/ the relentless passing Ferries wake, !
You should post the vid link on here so others can see her underway, onboard! Sounded good! |
    
John Treloar
Member
Username: johntr
Post Number: 29
Registered: 10-2005

| | Posted on Monday, January 16, 2017 - 11:42 pm: | 


|
Will upload a video to youtube and share. Thanks for your comments. Much appreciated. |


