| Author |
Message |
    
Richard Alcock
Advanced Member
Username: raa
Post Number: 40
Registered: 02-2007

| | Posted on Thursday, December 15, 2011 - 08:42 pm: | 


|
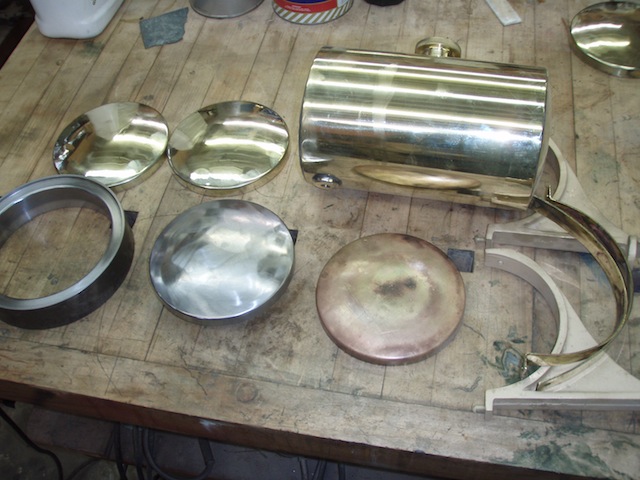
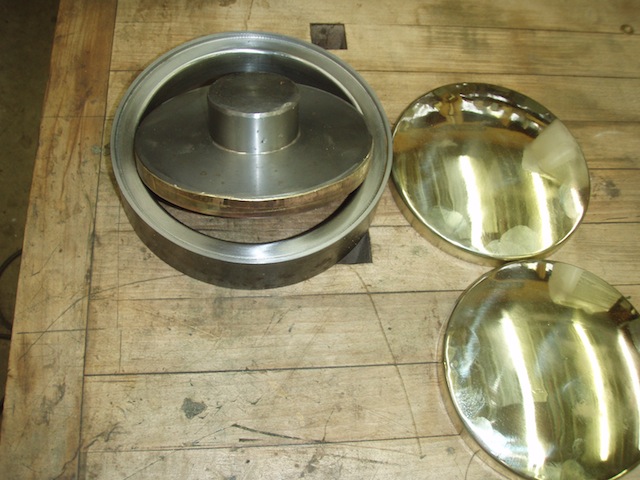
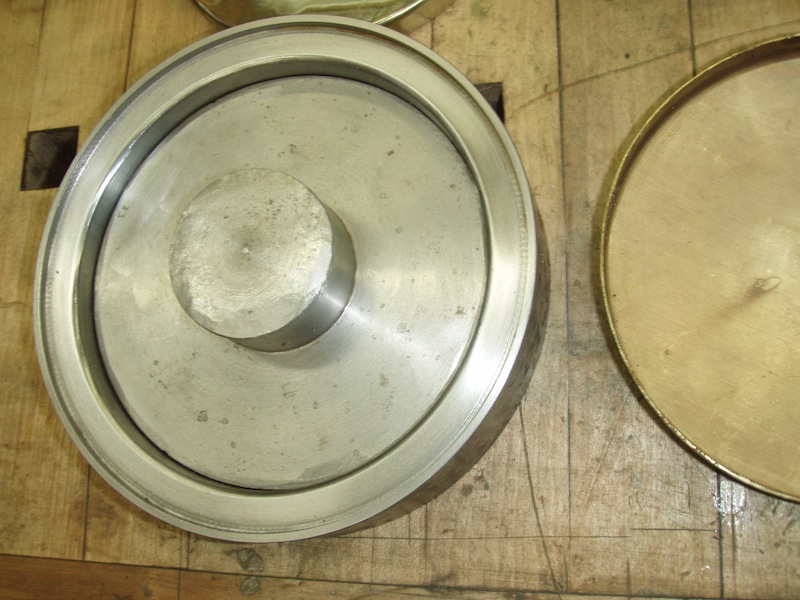
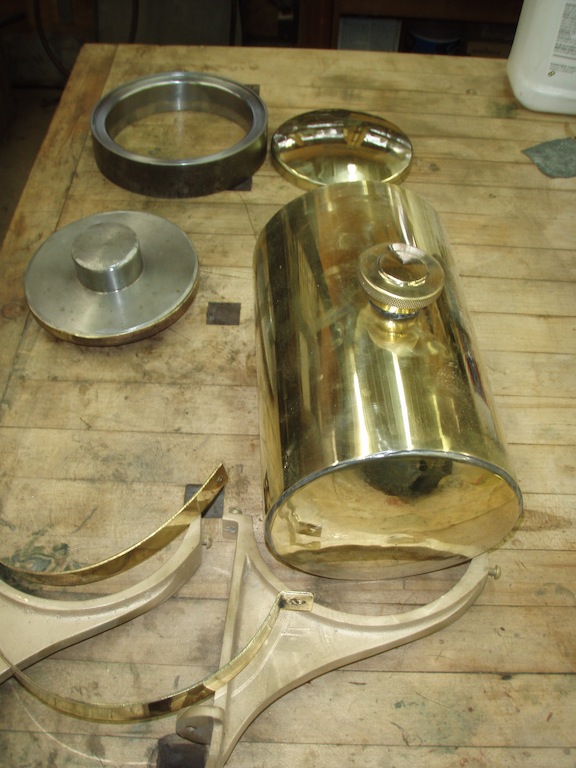
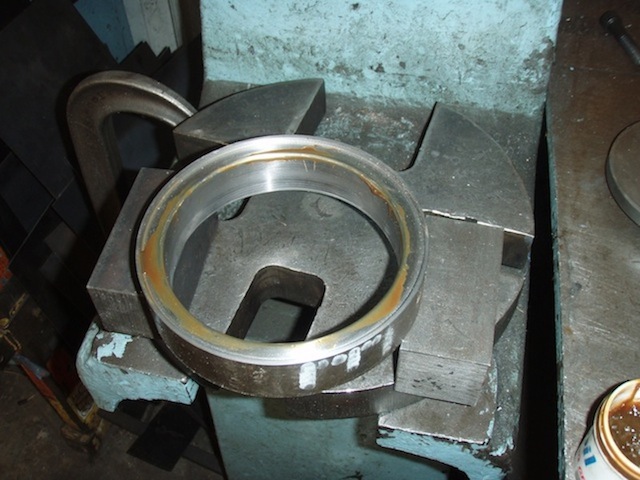
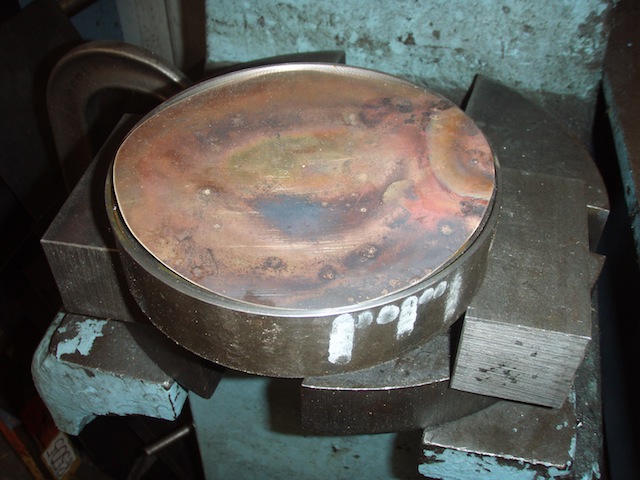
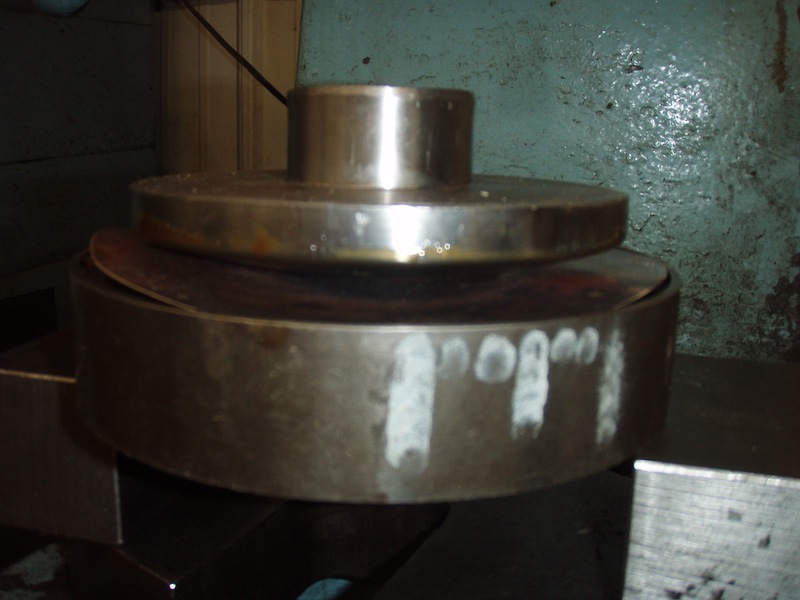
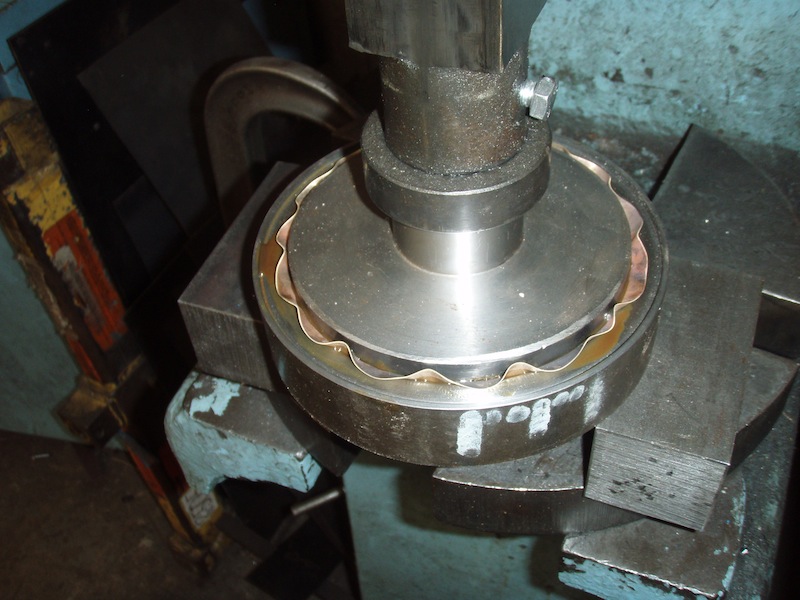
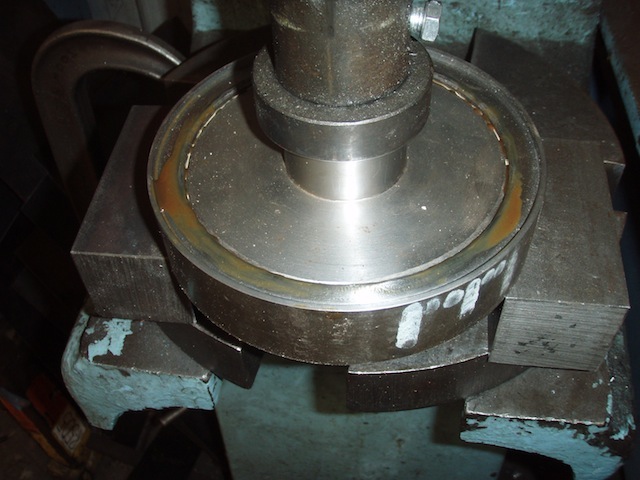
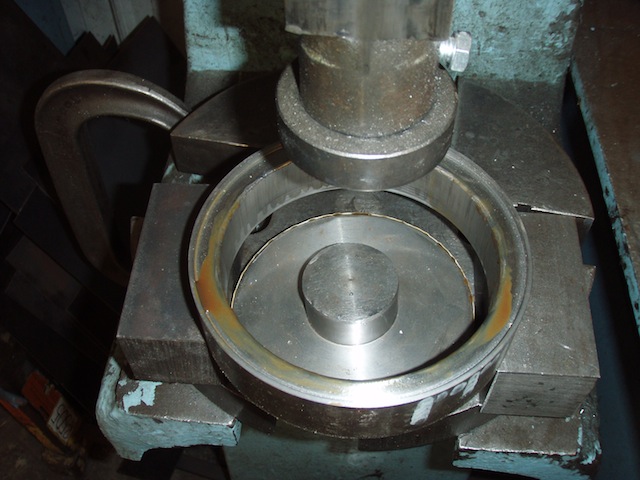
I thought I would pass along how I make my brass gas tanks. I get .020 half hard brass CA 260 sheared to size from Speedy Metals 262-784-4140 New Berlin Wi. The die formed ends are cut in circles and placed in the recess on the female die and the male part is shoved through forming the end with very little blemishes. I grease both halves of the die prior to forming. I use a compound arbor press with no problem. The ends are 5.330" dia. and the tank can be any length. I have .003" clearance between the male and female die. Prior to forming I use a torch and heat the blanks to a dull red and quench in water so they are real soft.
I also made a loose pattern to cast the tank supports which can be used on most engines.
 |
    
Jim Parrott
Advanced Member
Username: jim_parrott
Post Number: 36
Registered: 06-2009
| | Posted on Friday, December 16, 2011 - 04:08 am: | 


|
Dick,
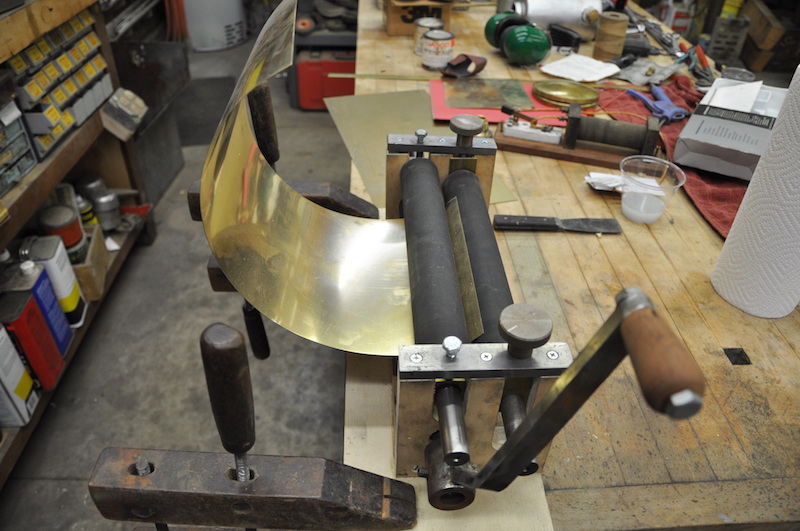
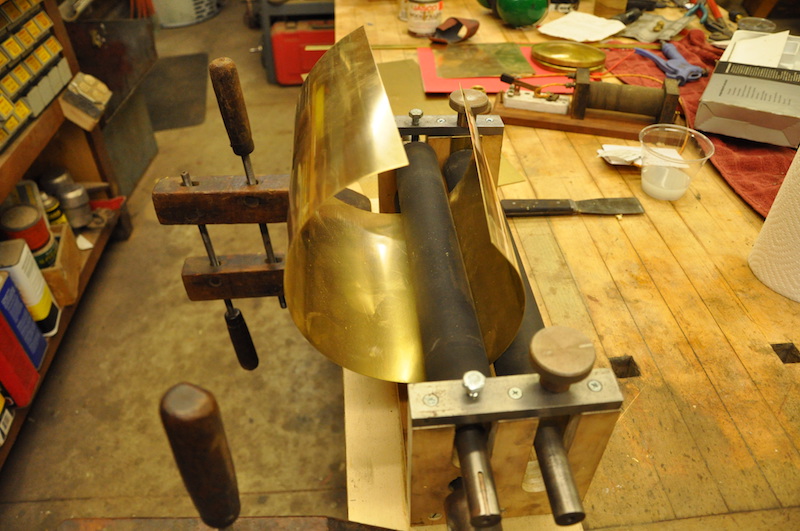
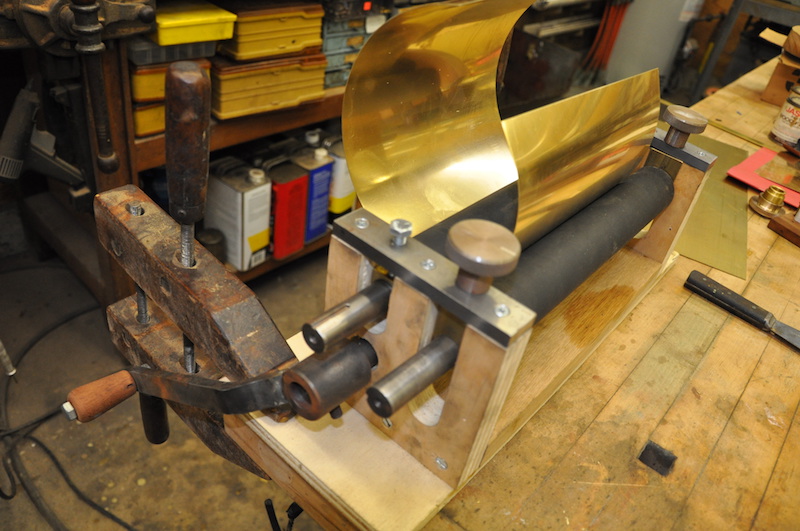
That is some good looking stuff. Do you get the tank as a tube or do you roll it? I always wanted to build some tanks and rivit them together.
Jim |
    
Harold (Hal) Houghton
New member
Username: hal1
Post Number: 2
Registered: 12-2010
| | Posted on Friday, December 16, 2011 - 04:53 am: | 


|
Hello Dick;
Can you tell me where you get the dies made? I am receiving many requests to reproduce the old vacuum tank floats.
Thank you.
Hal Houghton
The Classic Preservation Coalition |
    
Richard Alcock
Advanced Member
Username: raa
Post Number: 41
Registered: 02-2007

| | Posted on Friday, December 16, 2011 - 10:14 am: | 


|
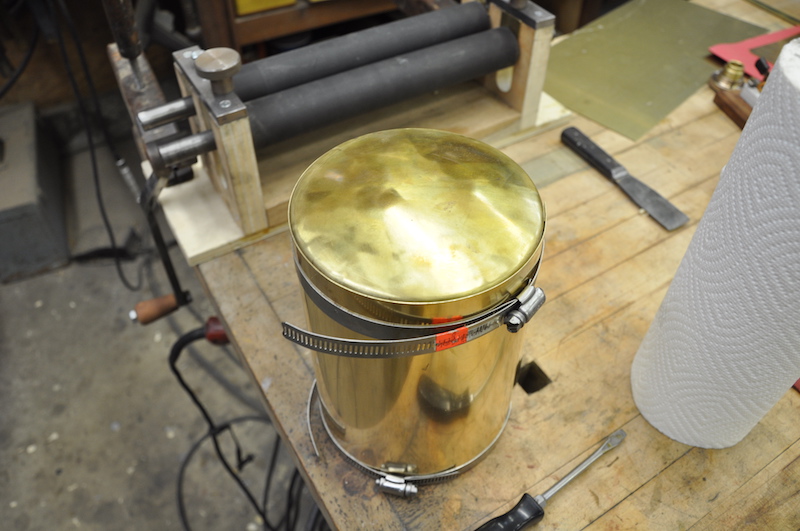
I get the brass cut to the size I need from Speedy Metal. I use hose clamps to hold the parts together and I fine scotch brite all the surfaces where I intend to solder. I use a paste to help the solder stick and I use Mc Master-Carr # 7656A4 high strength solder. After soldering I use a 6"x 12" scotch brite wheel to remove all excess solder and to generally clean the tank up. After the tank is partly soldered I drill a small hole where the drain and fill will be which lets the tank vent itself as I finish the soldering. After soldering I use a step drill to open the holes to what I need for the drain and fill parts. |
    
Richard Alcock
Advanced Member
Username: raa
Post Number: 42
Registered: 02-2007

| | Posted on Friday, December 16, 2011 - 10:20 am: | 


|
I made the female die myself and I had a friend spin the male part out on a CNC lathe. The clearance between the male and female die part is .040 plus .003" |
    
Harold (Hal) Houghton
New member
Username: hal1
Post Number: 3
Registered: 12-2010
| | Posted on Friday, December 16, 2011 - 05:07 pm: | 


|
Hello Dick;
Thanks for the response. Are you and your friends interested in making some dies for me? |
    
Keith kinney
Member
Username: kkinney
Post Number: 10
Registered: 04-2011
| | Posted on Friday, December 16, 2011 - 06:26 pm: | 


|
Beautiful work and tanks! I'd be interested in a set of dies too if anybody makes some. Richard, any chance you could make a YouTube video actually showing the process. I'm don't really fully understand how the dies work. What do you do for the filler and fuel line fittings. Thank you for posting.
Keith
www.herculesengines.com |
    
J.B. Castagnos
Senior Member
Username: jb_castagnos
Post Number: 637
Registered: 07-2002

| | Posted on Friday, December 16, 2011 - 07:20 pm: | 


|
They look great Dick. I read about a jig to make radius cuts, haven't tried it yet. It sounds like it should work and it's fairly simple. You make a pointed tool, like a pencil sharpened on both ends, you need a dimple in the cross feed, and a stop on the carriage with a dimple. The pointed tool sits between these dimples, parallel to the bed, the length of the tool will determine the radius of the cut. If you bring the carriage against the pointed tool and hold it there with the hand wheel, as you feed out the tool will start to angle, this will give you the radius. The compound has to be set at a 90, this allows you to feed in for each cut. The rod on the chuck side of the carriage will give a convex cut, on the tailstock side will give a concave cut. A threaded telescoping rod would allow to make one radius .030" smaller than the other. |
    
Andrew Selman
Member
Username: andys
Post Number: 13
Registered: 05-2007
| | Posted on Saturday, December 17, 2011 - 09:03 am: | 


|
Hello Dick,
That looks like great work!
I have a couple of questions :-
How much bigger is the original disc than the final diameter and does it just pull it in, smoothly without any wrinkles?
Did you find that the radius between the end dich and the side was critical, or did it just work?
Thanks
Andy |
    
Richard Alcock
Advanced Member
Username: raa
Post Number: 43
Registered: 02-2007

| | Posted on Saturday, December 17, 2011 - 03:04 pm: | 


|
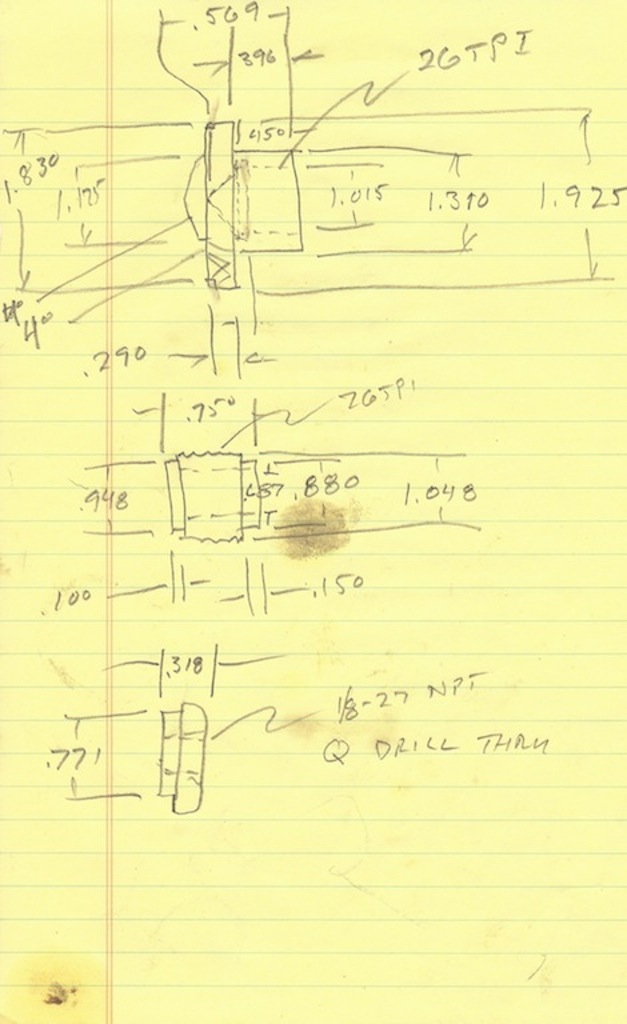
This is a hand sketch of the tank parts. The original brass disk is .80 approx larger than the male die. I see small wrinkles as the die starts to form but they all get smoothed out since there is only about .003 clearance. The radius is/was just a guess(happy accident). I will do two more ends next week and post a few more pictures to help clear things up. The annealed blanks simply lay in the recess on the top of the female die. This recess is about .125" deep and is about 6.25" in diameter. The blanks are about 6.125" in diameter. I noticed that I listed the scotchbrite wheel dimensions wrong should be 6"x 1" running at 3450 rpm
 |
    
Keith kinney
Member
Username: kkinney
Post Number: 11
Registered: 04-2011
| | Posted on Saturday, December 17, 2011 - 03:17 pm: | 


|
So there are just two parts to the die, the outer ring and the inner convex die? I was thinking you would have a 3rd concave bottom die but I guess the dish is formed by wrapping around the top die?
For the fittings you turn them yourself on a lathe?
Keith
www.herculesengines.com |
    
Richard Alcock
Advanced Member
Username: raa
Post Number: 44
Registered: 02-2007

| | Posted on Saturday, December 17, 2011 - 05:21 pm: | 


|
Yes I turn them on my lathe. The cap takes the most time but us old gezzeers got lots of time. Actually once you have all the tools and drills assembled it goes pretty quick. Since the threads are fine they cut in just a few passes. If you need just a few ends just get some material and cut them out and I will run them through for you.
cheers
Dick |
    
Richard Alcock
Advanced Member
Username: raa
Post Number: 45
Registered: 02-2007

| | Posted on Monday, December 19, 2011 - 03:54 pm: | 


|
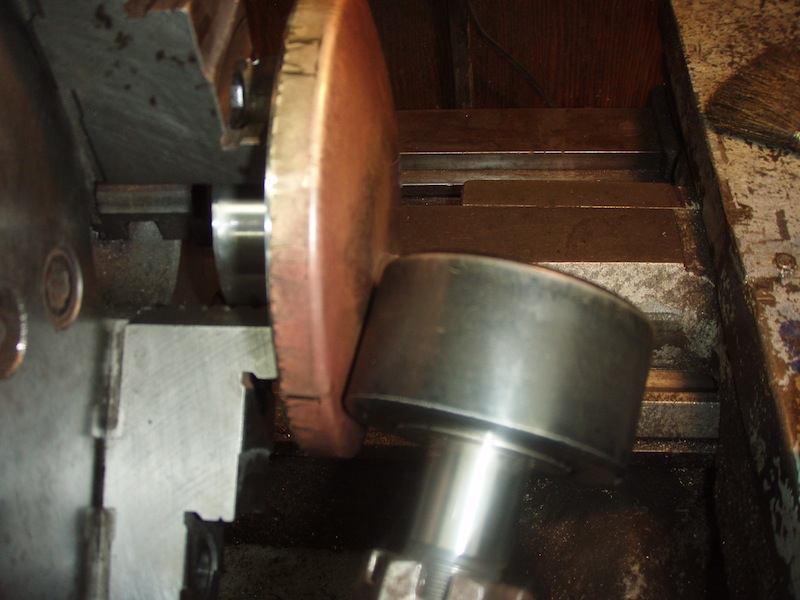
I ran a couple more tanks ends and took a few pictures to show the sequence better. I had a few more wrinkles which were hammered out easily with a plastic hammer. I also chucked up the tool and hand held a roller which smoothed out the little remaining marks.
 |
    
Paul Gray
Senior Member
Username: paulgray
Post Number: 107
Registered: 05-2003
| | Posted on Tuesday, December 20, 2011 - 07:01 am: | 


|
Rich- Thanks for posting those latest pictures. That really clarifies the process. |
    
Keith kinney
Member
Username: kkinney
Post Number: 12
Registered: 04-2011
| | Posted on Tuesday, December 20, 2011 - 06:56 pm: | 


|
Yes, thank you! That really helps to show how you did it.
Keith |
    
William Schaller
Senior Member
Username: billschaller
Post Number: 459
Registered: 12-2003

| | Posted on Thursday, December 22, 2011 - 11:04 pm: | 


|
Dick,
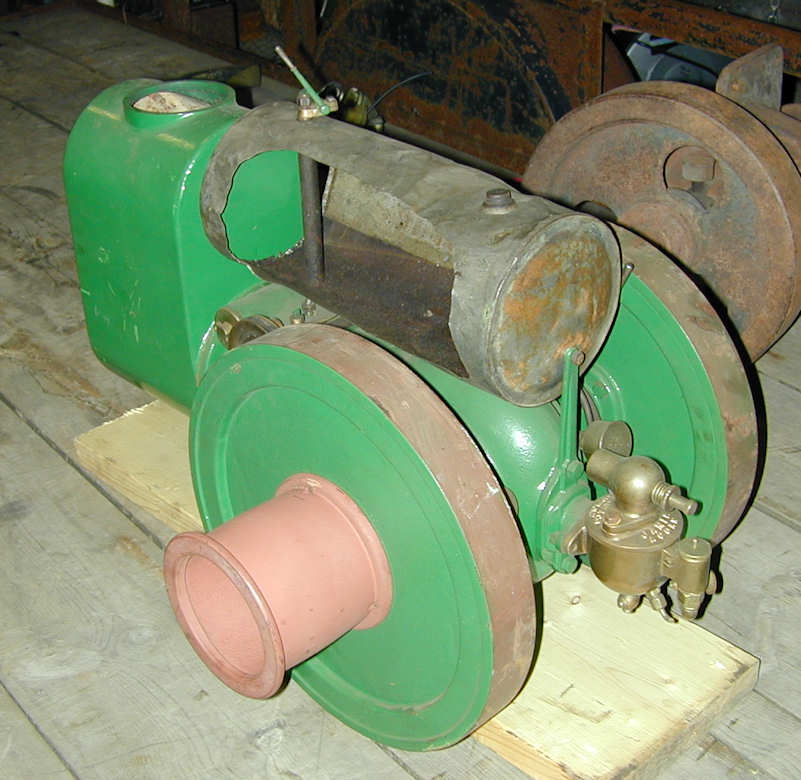
Can you show us how you make the tube? This very early Woolery seems to always leak.
 |
    
William Ferraro
Visitor
| | Posted on Wednesday, April 01, 2015 - 11:33 am: | 


|
Bayfield Maritime Museum: We are in the process of restoring a Motorgo Row Boat Engine. We have no gas tank. Who would we contact to find or have one made? |
    
J.B. Castagnos
Senior Member
Username: jb_castagnos
Post Number: 1046
Registered: 07-2002

| | Posted on Wednesday, April 01, 2015 - 05:00 pm: | 


|
Sears sold motors under the Motorgo label, not familiar with the row boat motor, could be one of a number of manufaturers . Can you post a picture? |
    
Richard Alcock
Senior Member
Username: raa
Post Number: 195
Registered: 02-2007

| | Posted on Friday, January 11, 2019 - 10:14 am: | 


|
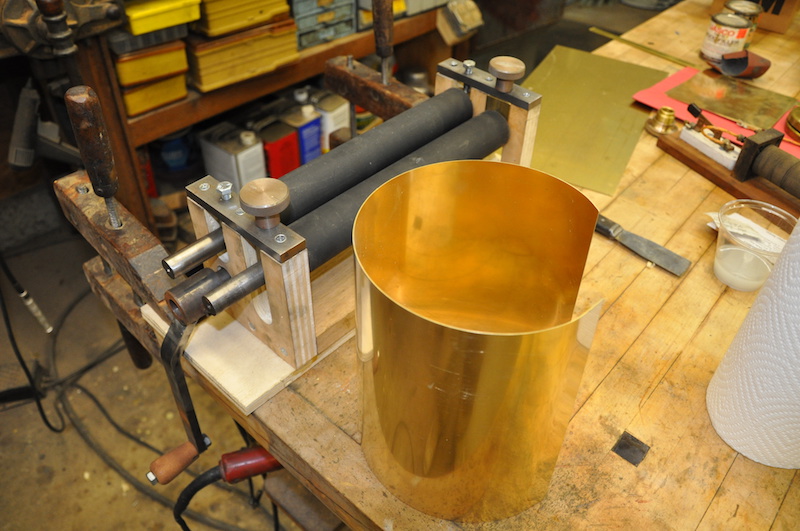
Here are a few pictures of a simple rolling device which I made to roll up my gas tanks.
|
    
Ned Lloyd
Senior Member
Username: ned_l
Post Number: 185
Registered: 08-2012
| | Posted on Thursday, January 17, 2019 - 05:21 pm: | 


|
Beautiful work!!!! |
    
chris spring
Senior Member
Username: spring
Post Number: 60
Registered: 06-2018
| | Posted on Friday, January 18, 2019 - 08:26 am: | 


|
Nice! |
    
Stef
Member
Username: ssilent11
Post Number: 9
Registered: 02-2007
| | Posted on Saturday, April 20, 2019 - 07:31 am: | 


|
very pleasing to see fine work |


