| Author |
Message |
    
jb_castagnos
Senior Member
Username: jb_castagnos
Post Number: 1250
Registered: 07-2002

| | Posted on Saturday, November 12, 2016 - 05:28 am: | 


|
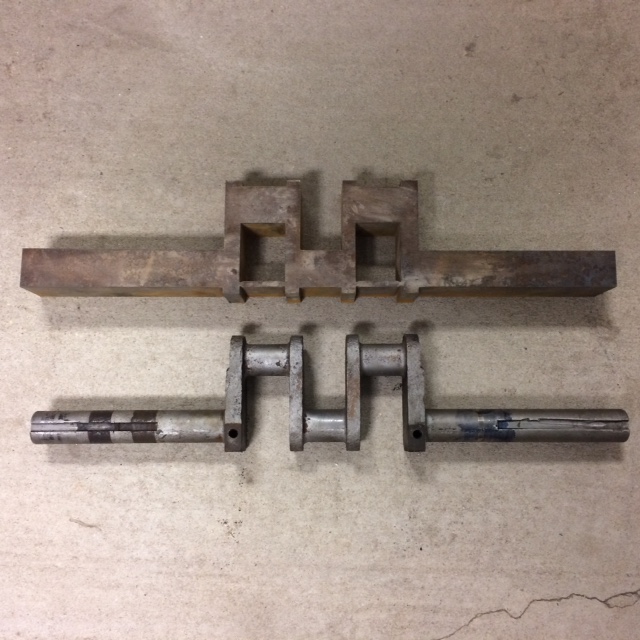
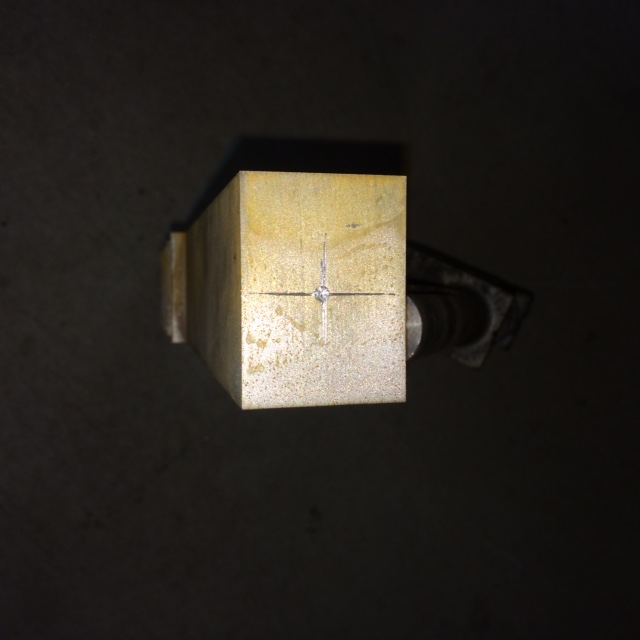
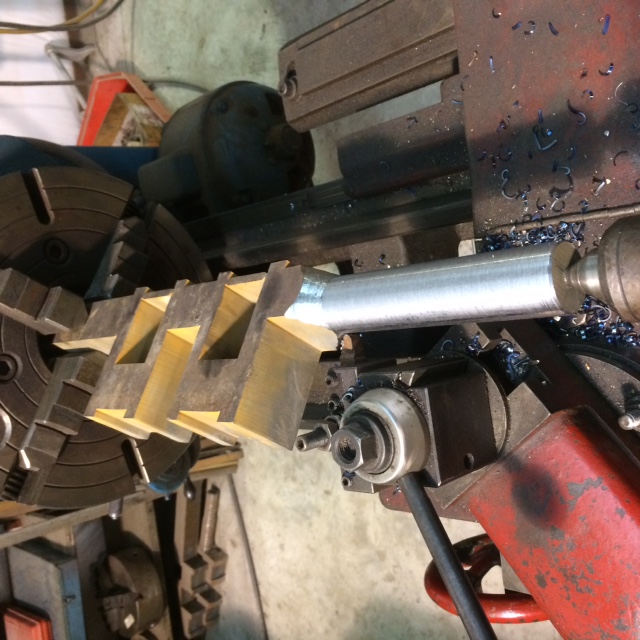
My friend Dick, RAA on here, was looking for a winter project. I sent him my early Buffalo 5hp twin, severe salt damaged, along with a donor parts engine. The donor engine would have been an easy rebuild, but it was spark plug ignition and a solid flywheel. The early engine is igniter and has a curved spoke flywheel. The Buffalo igniters are unique, operating from a face cam on a cross shaft. Dick snt me the crank to repair, it's a 360 firing motor, the donor was 180 degree. I decided to make a new crank, 2" thick plate. A friend offered to water jet cut it for me, great job but I was surprised to learn that it was on the table for 4 hours, going rate is $300 an hour. I found center, center drilled it, and started making it round.
 |
    
billschaller
Senior Member
Username: billschaller
Post Number: 661
Registered: 12-2003

| | Posted on Saturday, November 12, 2016 - 04:34 pm: | 


|
Great Work. It reminds me of this:
http://www.dieselduck.info/historical/01%20diesel%20engine/Doxford/works.htm |
    
jb_castagnos
Senior Member
Username: jb_castagnos
Post Number: 1252
Registered: 07-2002

| | Posted on Saturday, November 12, 2016 - 09:19 pm: | 


|
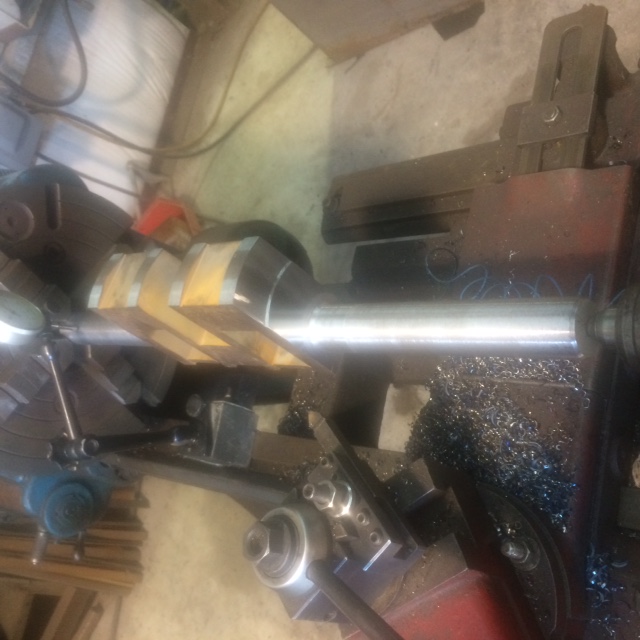
Today's progress, still a ways from a Doxford. Thanks for the link Bill.
 |
    
jb_castagnos
Senior Member
Username: jb_castagnos
Post Number: 1253
Registered: 07-2002

| | Posted on Sunday, November 13, 2016 - 06:57 pm: | 


|
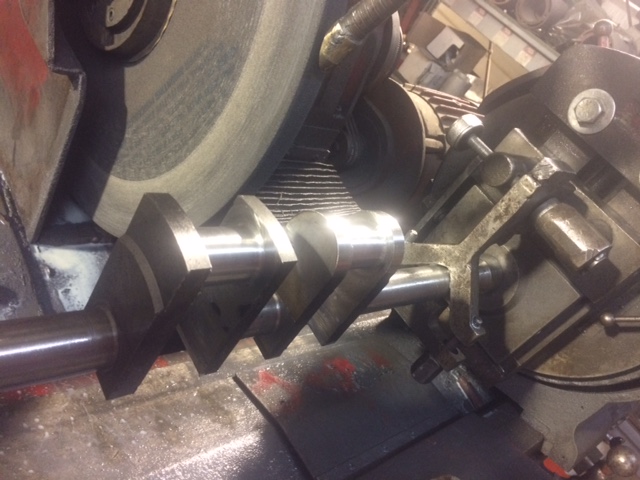
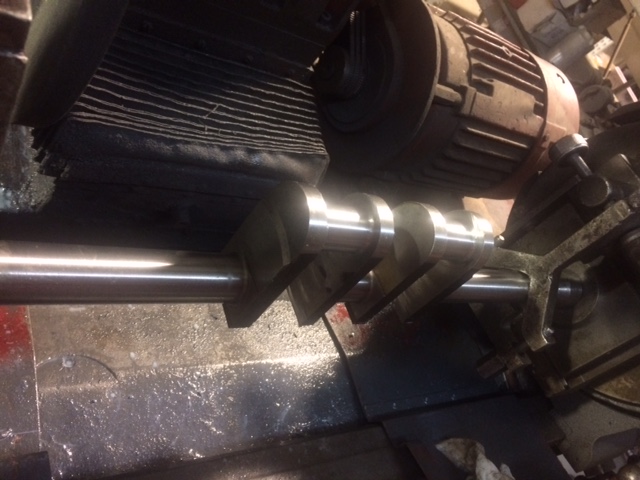
After lunch I put the crank in the grinder, rough ground the mains, including the center which was still square. I cut the supports out and ground the rod journals to size, then I ground the ends of the throws to the radius while it was set for the stroke. The grinding wheel had to be dressed after the interrupted cuts.
 |
    
raa
Senior Member
Username: raa
Post Number: 142
Registered: 02-2007

| | Posted on Sunday, November 13, 2016 - 07:36 pm: | 


|
Looks great JB this should finish the first "winter " project pretty soon.
Dick |
    
miro
Senior Member
Username: miro
Post Number: 891
Registered: 11-2001

| | Posted on Monday, November 14, 2016 - 01:35 pm: | 


|
JB - how deep a cut are you taking when you're doing the interrupted cuts on the lathe?
miro |
    
jb_castagnos
Senior Member
Username: jb_castagnos
Post Number: 1255
Registered: 07-2002

| | Posted on Monday, November 14, 2016 - 10:06 pm: | 


|
Too technical Miro, I don't look at the dial, just listen to what's going on. Start light, as it starts to round over increase speed and depth of cut, it's a slow process until it's somewhat rounded. |
    
raa
Senior Member
Username: raa
Post Number: 143
Registered: 02-2007

| | Posted on Tuesday, November 15, 2016 - 10:38 am: | 


|
Ditto that for me. When I did my first crank Bob Price had suggested C1050 which is a good choice but tough on high speed tools so I could only take about .03. the three cylinder crank was made from A572 like the Buffalo crank, much easier to cut.I used carbide tools and probably took about .06"per cut but as JB says you have to listen and observe what is going on. |
    
jb_castagnos
Senior Member
Username: jb_castagnos
Post Number: 1256
Registered: 07-2002

| | Posted on Wednesday, November 16, 2016 - 09:01 pm: | 


|
The crank is almost done, have to put the live center in the grinder, grind the ends to size, key it, and install the counter weights. 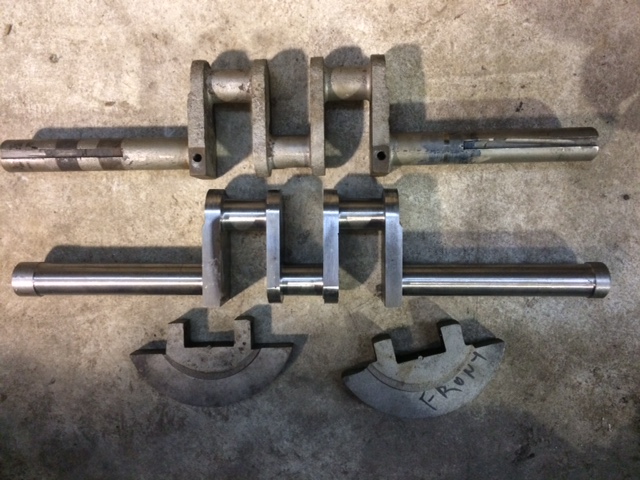 |
    
kayak
Senior Member
Username: kayak
Post Number: 70
Registered: 06-2016
| | Posted on Thursday, November 17, 2016 - 12:40 am: | 


|
amazing top see this done. I see lathe used for center-line (mains) areas and the square rod journals are in a grinder of some sort to bring them round. how are the rod journals finish machined? |
    
jb_castagnos
Senior Member
Username: jb_castagnos
Post Number: 1260
Registered: 07-2002

| | Posted on Thursday, November 17, 2016 - 08:22 am: | 


|
Go up two pictures and see the crankshaft in the grinder, it's offset for the stroke. Below is a link to another crank in the grinder.
https://www.youtube.com/watch?v=eCbhlObnMVo |
    
raa
Senior Member
Username: raa
Post Number: 144
Registered: 02-2007

| | Posted on Thursday, November 17, 2016 - 09:28 am: | 


|
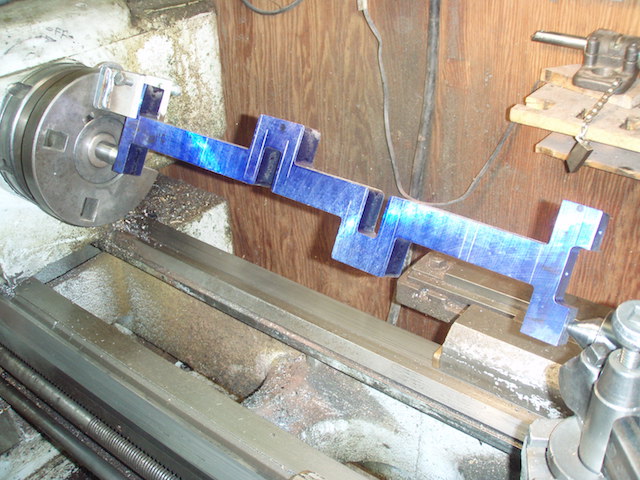
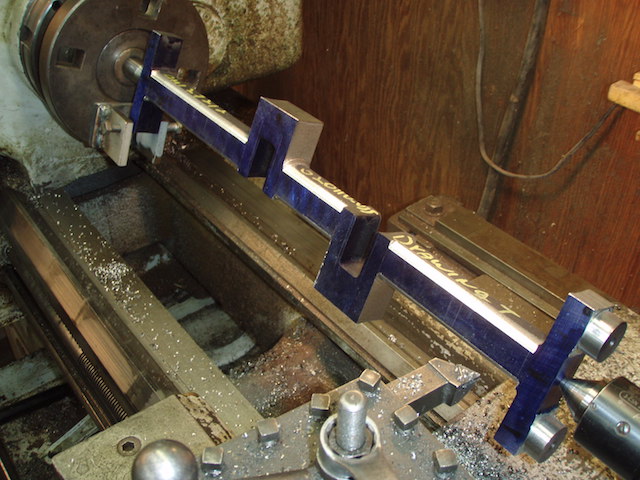
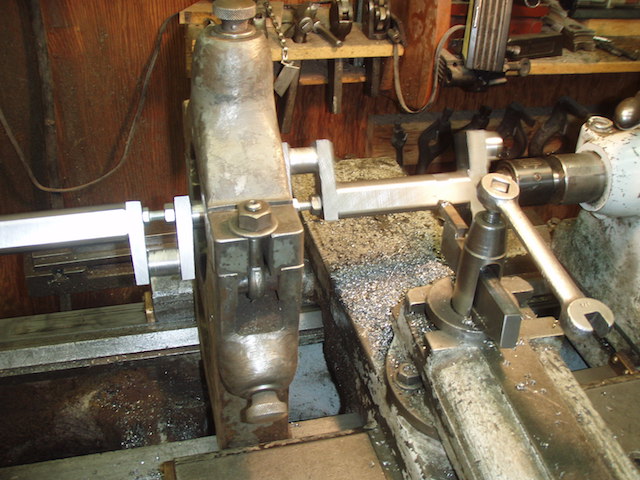
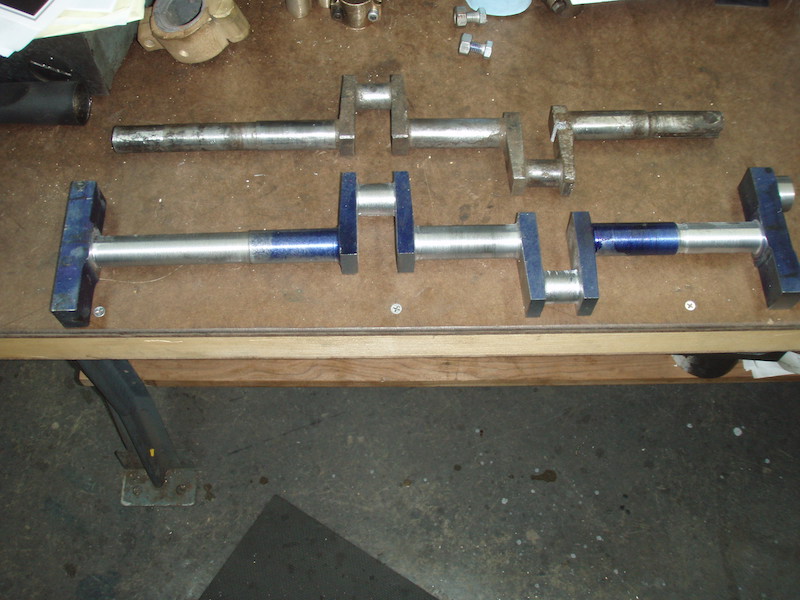
Here is another way to cut the throws. this is a crank for a Montreal copy of a Waterman K2 engine.
The crank was awfully flimsy so I could only take light cuts and I had to make special tool holders for the brazed tip cutters.
\     |
    
robert
Senior Member
Username: robert
Post Number: 804
Registered: 07-2003
| | Posted on Friday, November 18, 2016 - 11:42 am: | 


|
Most impressive work gentlemen. |
    
jb_castagnos
Senior Member
Username: jb_castagnos
Post Number: 1261
Registered: 07-2002

| | Posted on Saturday, November 19, 2016 - 08:20 am: | 


|
Thanks Robert, good to know someone's looking, this site doesn't get much response compared to Smokstak. |
    
worth
Member
Username: worth
Post Number: 8
Registered: 12-2011
| | Posted on Saturday, November 19, 2016 - 09:55 am: | 


|
JB, I'm looking too, every day in fact. I'm fascinated with everything you guys do to keep these old engines running.
Back in 1972 and 1973, I lived in Greece on a fishing boat with a one-cylinder Bolinder that was started by using a blow torch on a heat conductive pin that extended into the cylinder. Here are pics of the boat, but unfortunately I never got a picture of the engine!
This is 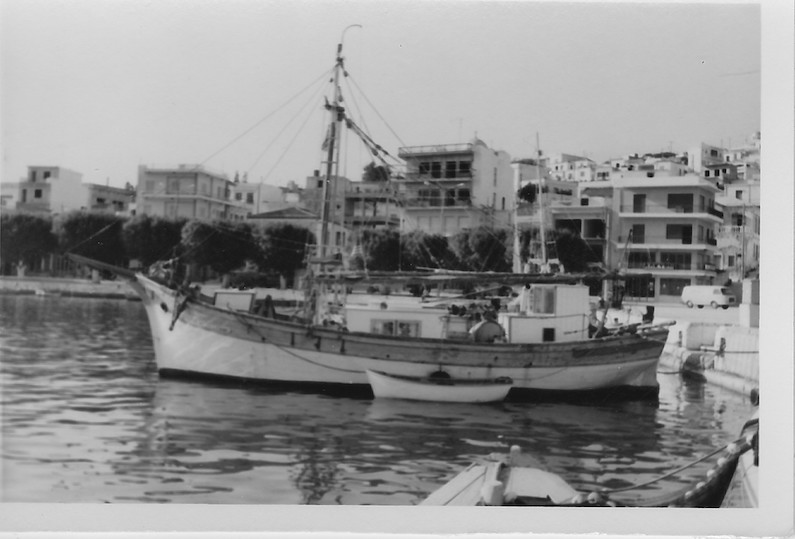
This is 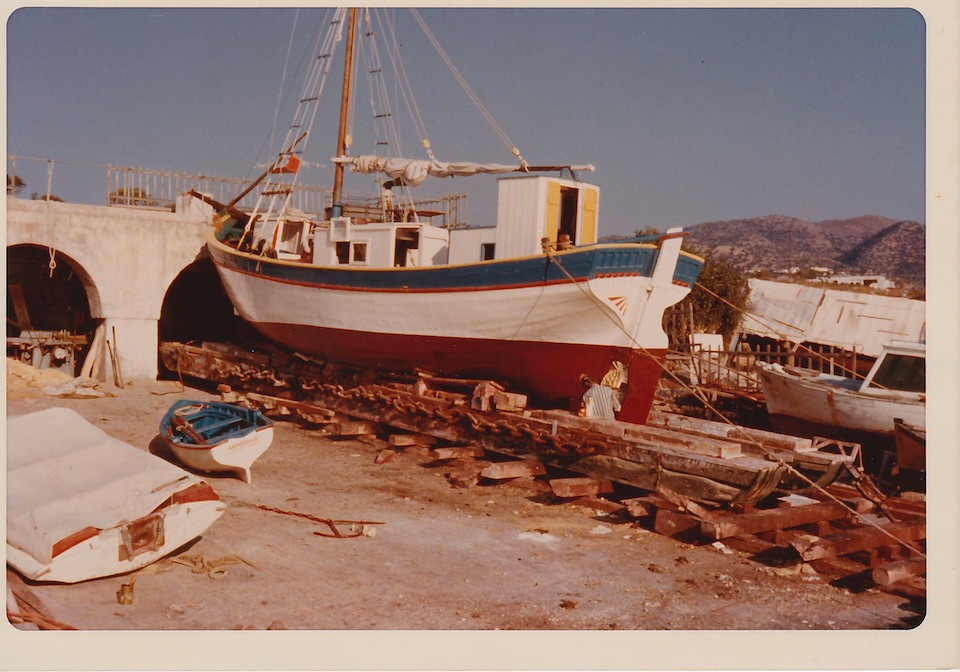 |
    
raa
Senior Member
Username: raa
Post Number: 145
Registered: 02-2007

| | Posted on Saturday, November 19, 2016 - 10:19 am: | 


|
Do you have any idea what the hp was on the Bolinder ? Did it look anything like the one in the link below? I got that one going a few years ago in a Cannery Called Snug Harbor. The Snug Harbor Bolinder is 35 hp and had Champion Glow plug for starting ---but has a pin which may be what you are referring too.
https://www.youtube.com/watch?v=PwPsBedakEs |
    
worth
Member
Username: worth
Post Number: 9
Registered: 12-2011
| | Posted on Saturday, November 19, 2016 - 11:02 am: | 


|
No, I don't know the HP, but it was smaller than the engine in the video, maybe about 2/3 that size. I remember it had a solid flywheel, about 2 feet in diameter, with a spring-loaded pin that you would push out with a finger and use to rock the engine to start it. It also had a variable pitch prop with enough range of adjustment to do reverse, so no FNR transmission. |
    
bgoss
Senior Member
Username: bgoss
Post Number: 245
Registered: 12-2007
| | Posted on Saturday, November 19, 2016 - 06:39 pm: | 


|
JB - your work is much appreciated. Keep posting. The thanks button on the stak makes it quick and easy to give feedback. Blair |
    
brownboat
Member
Username: brownboat
Post Number: 18
Registered: 02-2013
| | Posted on Saturday, November 19, 2016 - 10:32 pm: | 


|
Great post, fascinating to see how this stuff is done. I follow smokstak but would like to see more posts like this here. |
    
jb_castagnos
Senior Member
Username: jb_castagnos
Post Number: 1263
Registered: 07-2002

| | Posted on Saturday, November 19, 2016 - 10:50 pm: | 


|
I was hoping there was some interest, thanks for the post. I've been trying to finish my 61 Corvette, marine engines have been on hold. I'll post the projects in the future, lots of them waiting. |
    
robert
Senior Member
Username: robert
Post Number: 810
Registered: 07-2003
| | Posted on Sunday, November 20, 2016 - 01:23 pm: | 


|
Now I see why those fillets were left between the throws on the water-jetted billet: so the throws wouldn't spring under
the pressure of the lathe centers and bend the crank out of square...Makes me wonder if the throws are better cut out on
the lathe entirely after the rounds are turned and ground?
[2.5 lines of text in the posting box produces a line of text on the submitted post that is within the screen borders without
scrolling over to the right. Just hit RETURN after 2.5 lines and carry on! Just a thought] |
    
jb_castagnos
Senior Member
Username: jb_castagnos
Post Number: 1264
Registered: 07-2002

| | Posted on Sunday, November 20, 2016 - 08:33 pm: | 


|
I had him leave the supports so I could turn the mains, didn't want to leave them until the end, may have been some stress
that would change things when cut. Thanks for the tip on posting, seems once there's a long post the rest follow suit. |
    
raa
Senior Member
Username: raa
Post Number: 146
Registered: 02-2007

| | Posted on Sunday, November 20, 2016 - 09:17 pm: | 


|
Perhaps stress relieving and then Blanchard grinding be a good idea after flame cutting or plasma cutting. |


